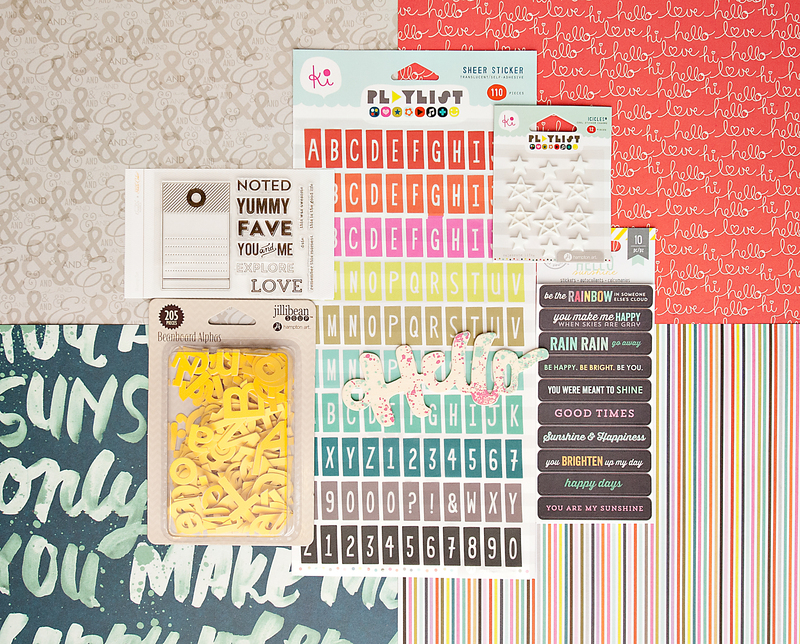
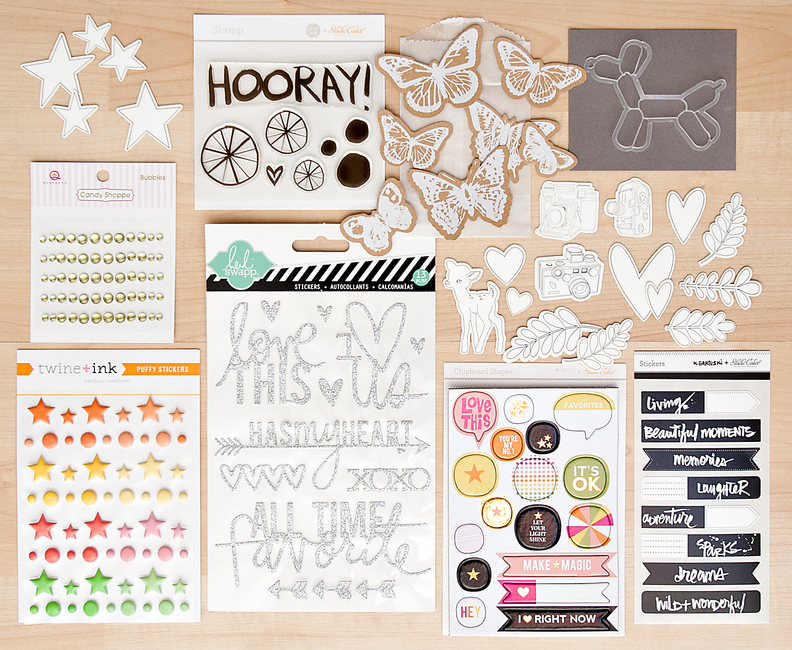
I had tons of fun making my layouts for this month - four of the five with the help of my Silhouette Cameo - also known as my best (non-human) friend :)
FUN MOMENTS by Paige Evans
Description: For my sneak peek layouts I was asked to showcase the HOLA and NI HAO add-on kits. Here is the layout I made with the HOLA add-on kit.
I had so much fun die cutting and coloring the Polaroid frames by In a Creative Bubble! I've had these little photos of our everyday moments printed for a year or so and finally got them scrapped using a simple grid design.
How to: Die cut the Polaroid frames by In a Creative Bubble then spray them with a rainbow of mist. Trim the packaging from the KI sheer letter sticker sheet into triangles and adhere them on the top left and bottom right corners. Straight and zigzag stitch around the layout to keep the eyes from wandering off the edges. Place the frames in a 3 x 2 grid, add a small photo inside each, then embellish the frames with matching colored embellishments including the HELLO HELLO printables and labels by Hello Forever and In a Creative Bubble.
Supplies: Scrapbook kit: HOLA by Studio Calico; Cardstock, adhesive, punches (airplane, star): American Crafts; Spray mist: Mr. Huey's by Studio Calico; Die cut machine: Silhouette Cameo by QuicKutz; "Polaroid Frames" cut file: In a Creative Bubble for Studio Calico; Hello Hello Printables by Hello Forever for Studio Calico; Hello Hello Labels by Hello Forever for Studio Calico; Hello Hello Printables by In a Creative Bubble for Studio Calico; Sewing machine: Brother; Thread: Coats & Clark
***********************************************************
ADORABLE & SWEET by Paige Evans
Description: I got the opportunity once again to design a couple of exclusive cut files for Studio Calico for the month of June and used my STRIPED AMPERSAND cut file on this layout!
This was my other sneak peek layout using the NI HAO SCRAPBOOK ADD-ON.
How to: Die cut the STRIPED AMPERSAND from white cardstock, use it as a template to paint white on the pink polka dot paper, then back it with the multi-patterned striped paper using dimensional adhesive; adhere the & on the layout. Layer photos, the doily, ampersand paper clip, jewels, chevron bag, and heart printable on the bottom right. Stitch letters around the curves of the top left and bottom right to make the title then journal on the bottom left curve of the ampersand. Stamp the date on the bottom of the bag.
Supplies: Scrapbook kit: NI HAO by Studio Calico; Spray mist: Mr. Huey's by Studio Calico; Cardstock, adhesive: American Crafts; Die cut machine: Silhouette Cameo by QuicKutz; STRIPED AMPERSAND cut file: Paige Evans for Studio Calico; Printables: Hello Forever for Studio Calico; Sewing machine: Brother; Thread: Coats & Clark; Roller date stamp: Kesi'Art; Ink: StazOn
***********************************************************
WIEN by Paige Evans
Description: For one of my two HELLO HELLO MAIN KIT only layouts I wanted to use the GEOMETRIC CIRCLES BACKGROUND cut file I designed exclusively for Studio Calico for June!
Here's a picture of the contents of the HELLO HELLO MAIN KIT - perfect vibe for summer right?!?
Journaling says: Another layout without journaling...
How to: Die cut the geometric circles background cut file from robin's egg blue cardstock then back the holes with all the papers from the HELLO HELLO MAIN KIT. Print and cut out all of the printables for June: Hello Hello Printables by Hello Forever, Hello Hello Labels by Hello Forever, Hello Hello Printables by In a Creative Bubble, Hello Hello Printables by Celine Navarro. Layer cards and shapes and what not on the center topped with a photo. Stitch letters above the photo for a title. Embellish the circle printables with matching colored jewels. Stamp the date on one of the gold-trimmed label die cuts. Sprinkle jewels over the centers of some of the geometric circles.
Supplies: Scrapbook kit: HELLO HELLO by Studio Calico; Cardstock, adhesive: American Crafts; Die cut machine: Silhouette Cameo by QuicKutz; GEOMETRIC CIRCLES background cut file: Paige Evans for Studio Calico; Hello Hello Printables by Hello Forever for Studio Calico; Hello Hello Labels by Hello Forever for Studio Calico; Hello Hello Printables by In a Creative Bubble for Studio Calico; Hello Hello Printables by Celine Navarro for Studio Calico; Sewing machine: Brother; Thread: Coats & Clark; Roller date stamp: Kesi'Art; Ink: StazOn
***********************************************************
#US by Paige Evans
Description: In typical Paige fashion, I used a favorite technique for this layout: die cutting a large shape and backing it with papers from the HELLO HELLO MAIN KIT! The intricate heart cut file was made from the Hello Hello Add On Digital Stamps by In a Creative Bubble:
Journaling says: We have so much fun together! Just taking a little mother/daughter selfie - this was the first take too!
How to: Die cut the intricate heart from the Hello Hello Add On Digital Stamps by In a Creative Bubble then back most of the open spaces with papers from the HELLO HELLO MAIN KIT. Adhere the heart on a kraft background then add matching colored jewels to some of the papers. Curve and add border stickers around the heart. Trim a journaling spot sticker in half, tuck the halves under a photo, and add the photo to the bottom right side of the layout; journal on the bottom piece. Trim printable sentiments and stitch them to the heart. Staple a title on the top left.
Supplies: Scrapbook kit: HELLO HELLO by Studio Calico; Cardstock, adhesive, pen: American Crafts; Sewing machine: Brother; Thread: Coats & Clark; Die cut machine: Silhouette Cameo by QuicKutz; Intricate heart cut file: Hello Hello Add On Digital Stamps by In a Creative Bubble; Stapler: Tiny Attacher by Tim Holtz; Printables: In a Creative Bubble for Studio Calico;
***********************************************************

A PENNY 4 YOUR THOUGHTS by Paige Evans
Description: I like creating a layout using ALL of the scrapbooking kits for the month: HELLO HELLO, HOLA, NI HAO, and one I hadn't used yet: BONJOUR, full of fun embellishments!:
Journaling says: What I wouldn't give to know what you're thinking here! Probably bugs and dinosaurs :)
How to: Stamp the wheel circle found in the BONJOUR add-on kit onto all of the patterned papers from all of the kits. Then I enlisted the help of my dear, sweet husband to help me cut them all out by hand. He's a total keeper :) I machine and hand stitched a thought bubble onto the majority of a dark gray cardstock layout using white thread. Then I used white paint to stamp some of the foam stamps in the HELLO HELLO main kit (fun that foam stamps are making a comeback!) inside the thought bubble. I filled in the rest with the stamped/cut out circles, jewels, puffy stars and circle stickers, chipboard circles, and more, until it was all filled! I placed the title around the bottom curve then added a photo to layers of printables and label packaging on the bottom left corner. I journaled with a white pen to help it pop off the page.
Supplies: Scrapbook kits: HELLO HELLO, NI HAO, BONJOUR, and HOLA by Studio Calico; Ink: Color Theory by Studio Calico; Sewing machine: Brother; Thread: Coats & Clark; Hello Hello Printables by Hello Forever for Studio Calico; White pen: Uniball Signo
Next reveal is July 27th! It'll be here before we know it!


These are all so amazing Paige!! I love how you used the cut files on the first four layouts and the stamp on the fifth!!
ReplyDeleteseriously AWESOME!!
ReplyDeleteWow...fabulous pages! I could just dive in to all that color!
ReplyDelete