
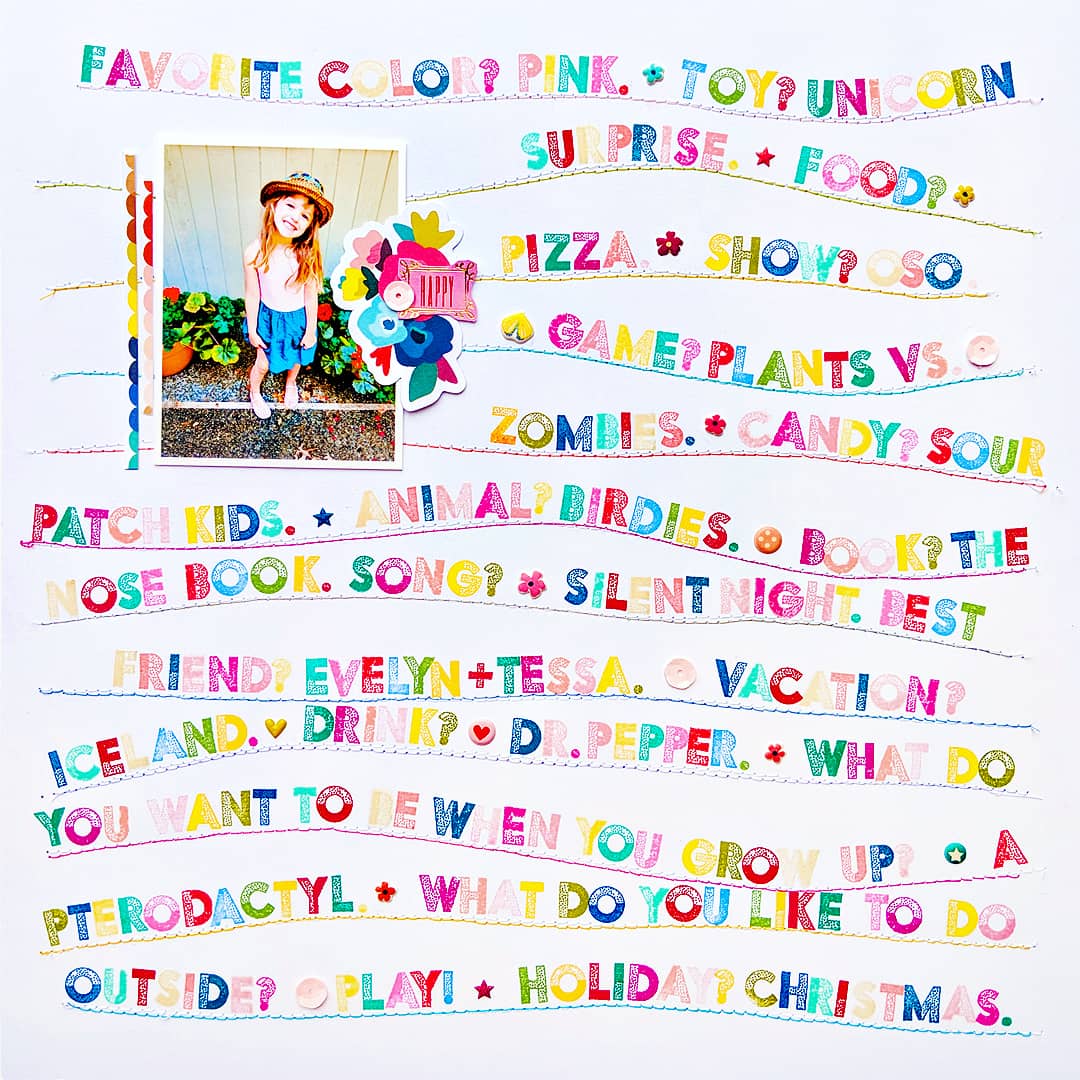
I have a new layout and process video to share with you today!! This page feautures my new Pick-Me-Up Alphabet Stamps!
Here is a process video so you can see exactly how this layout came together - mistakes and all!
Here is a process video so you can see exactly how this layout came together - mistakes and all!
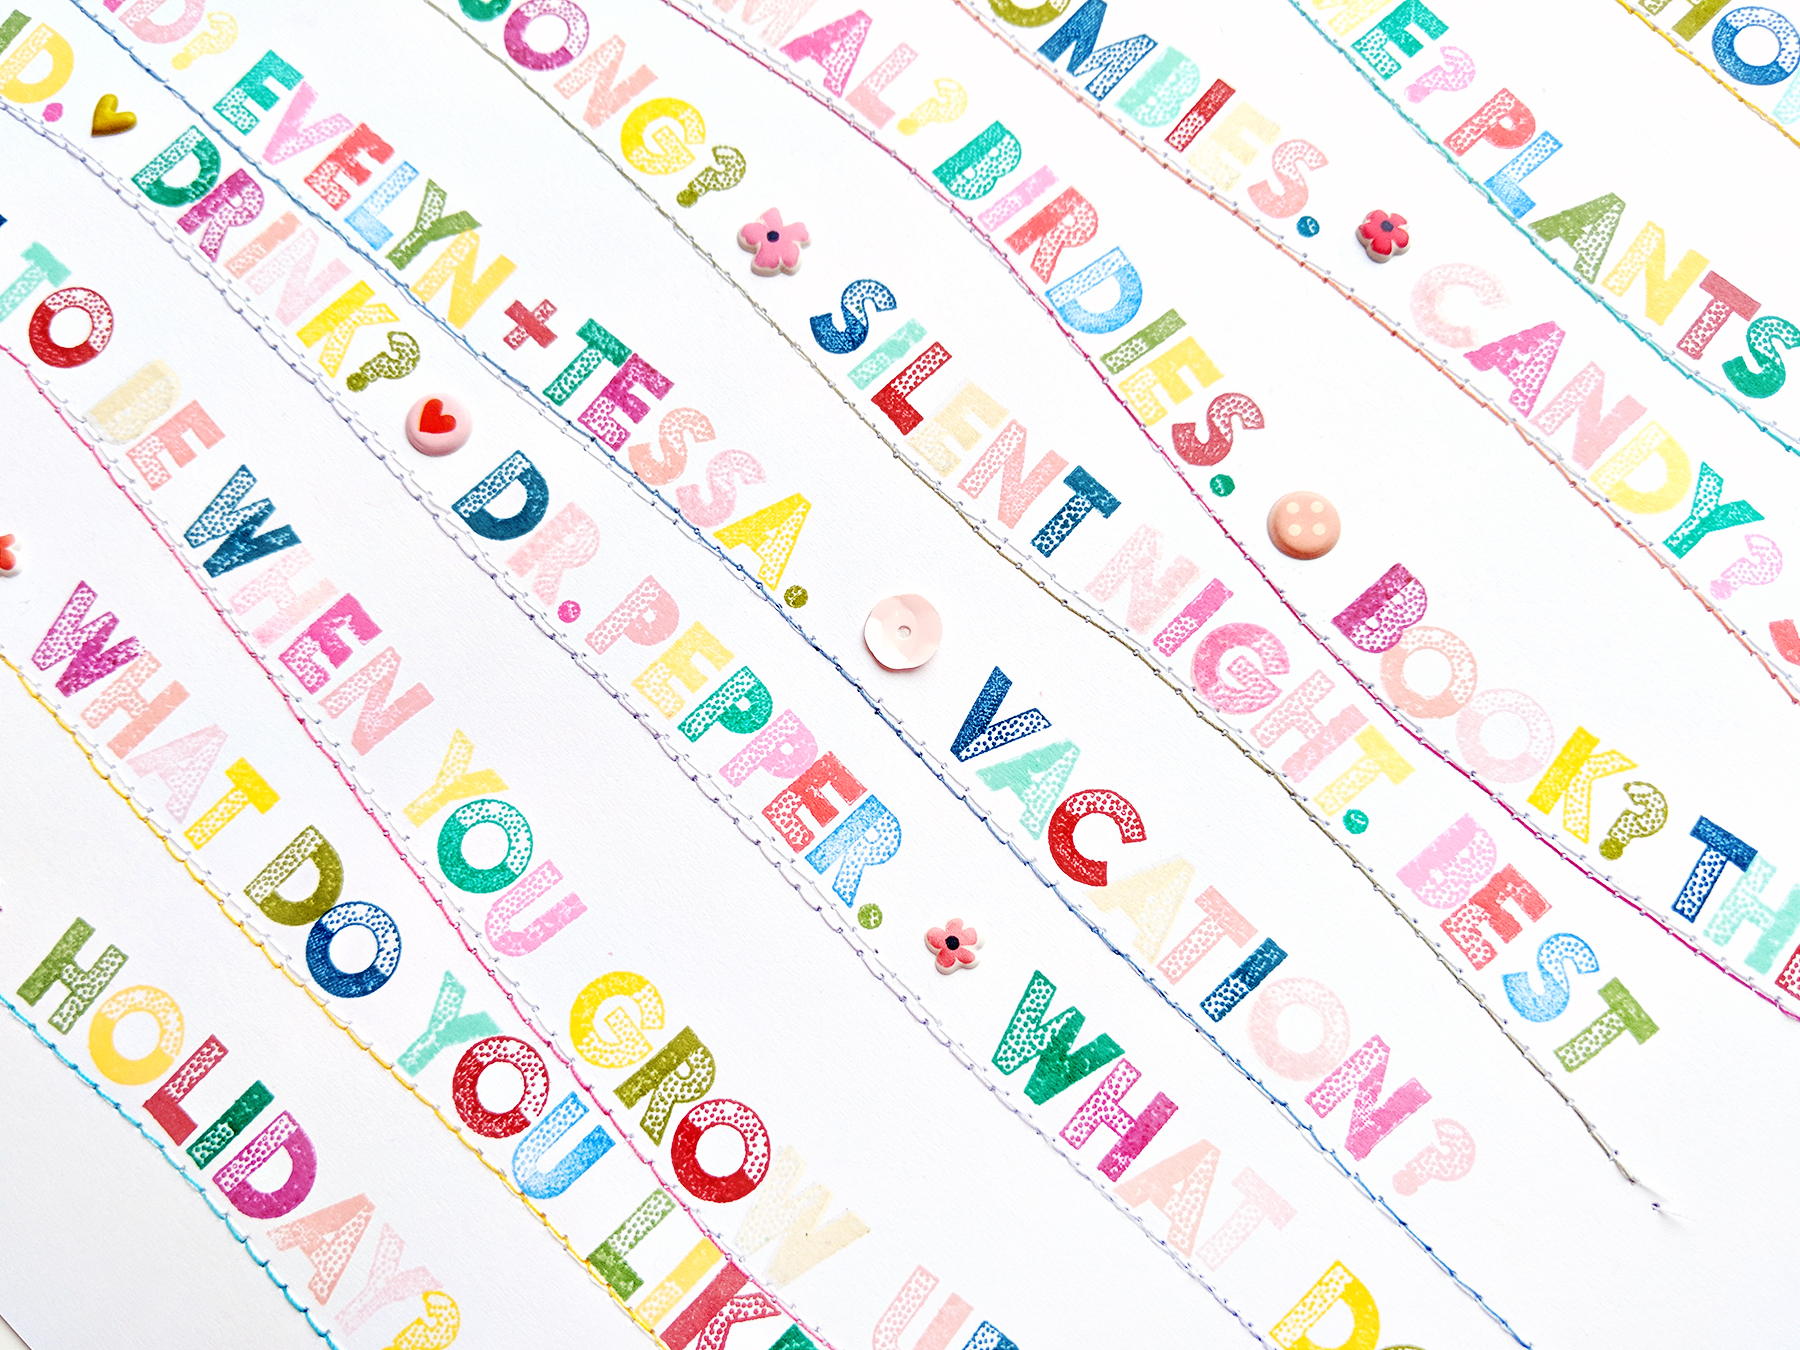
I started with a white cardstock background because I knew I wanted to use the stamps and lots of colored inks. I had the idea to do stamping along stitched lines so that's what I did first, but only the top 2/3 of the page and at first I only used white thread. I didn't want to do straight lines because I can't sew straight lines! So I went with the flow and exaggerated the lines so be purposefully not straight.
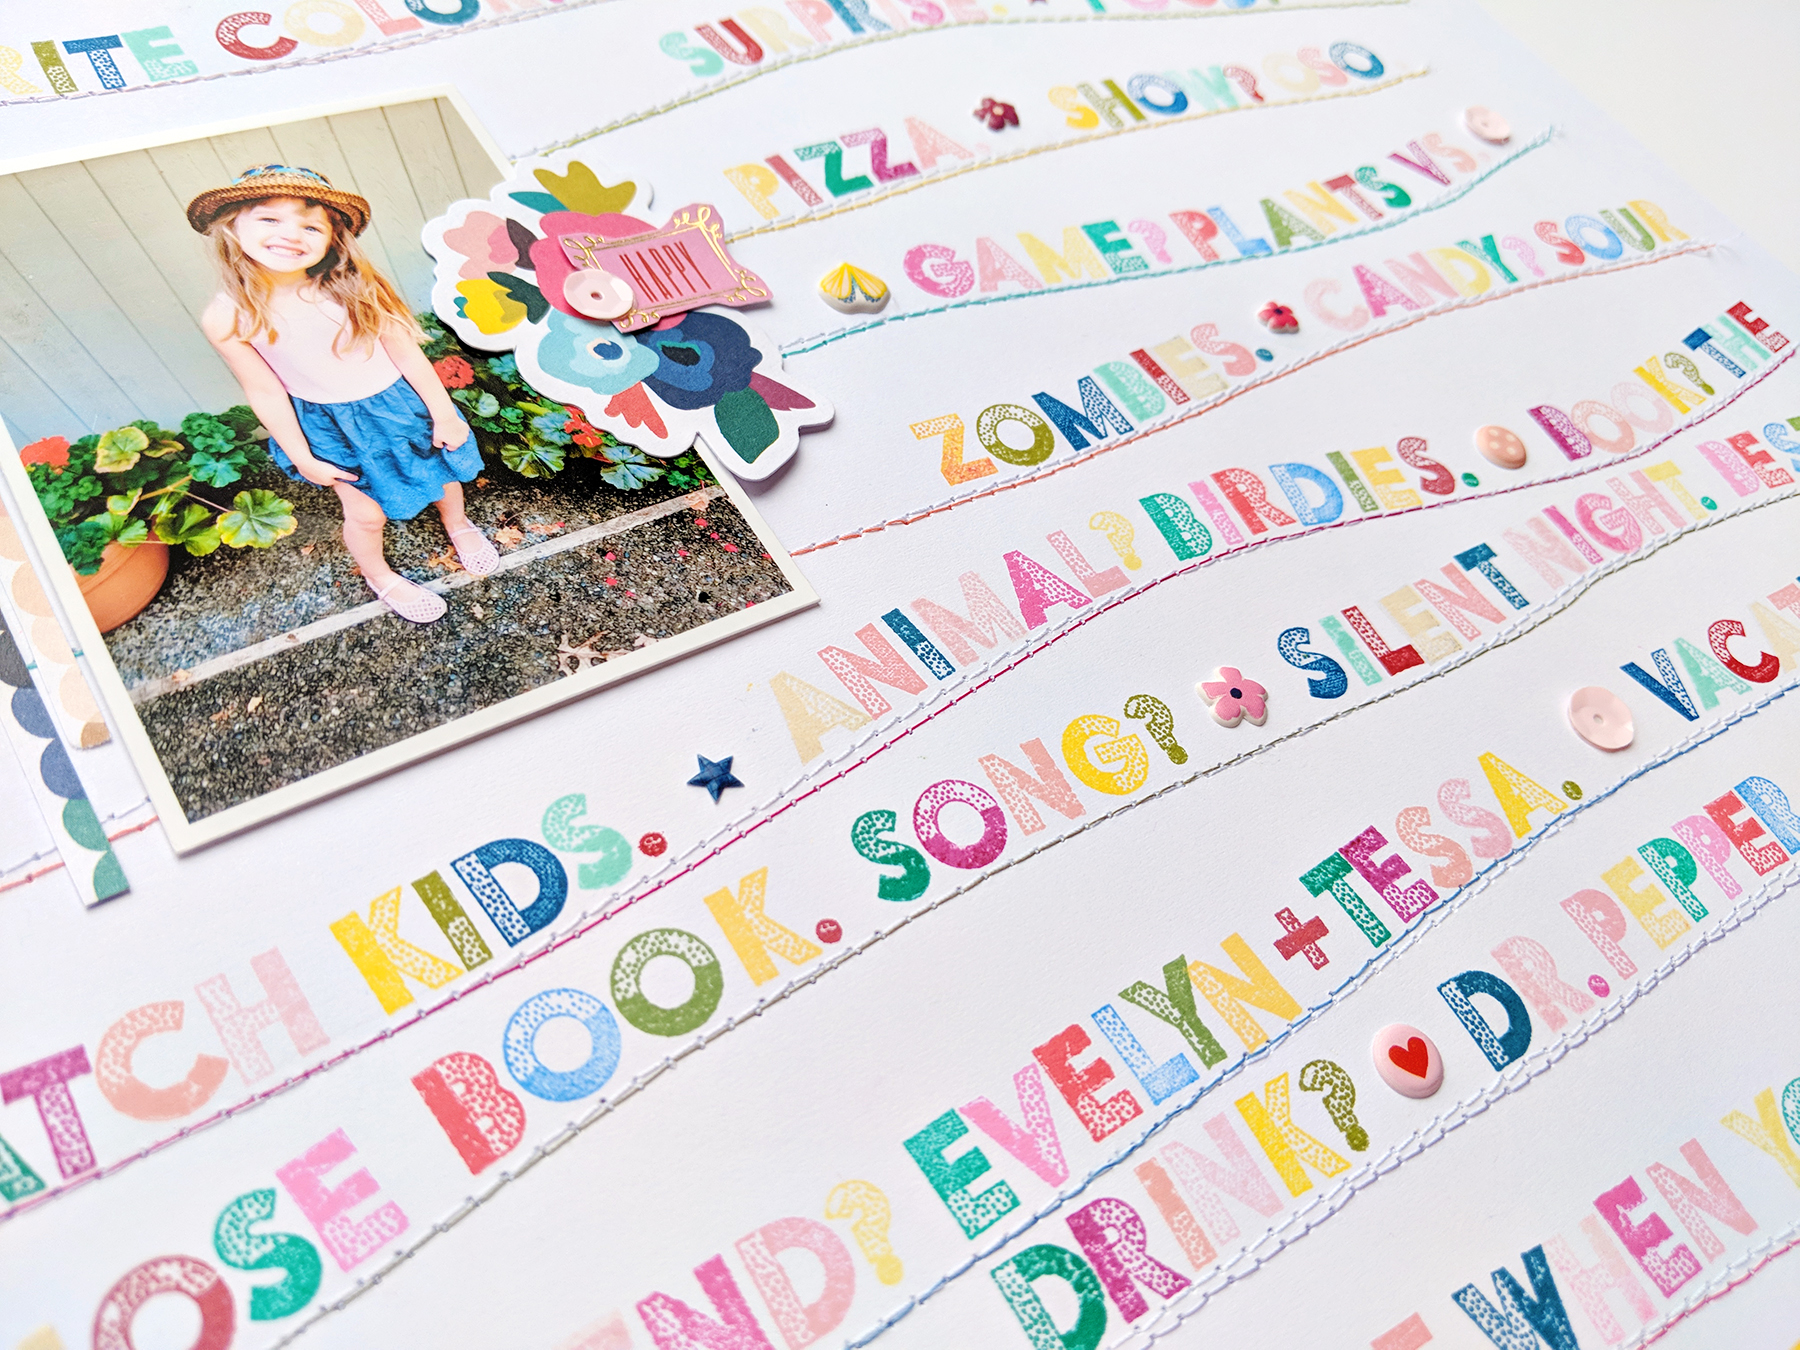
Next came the stamping! I pulled out all of the colors of ink that I own that coordinate with Pick-Me-Up and stamped the letters one at a time. This took awhile. But it's so fun to see the background come together! Speaking of the background, I had only just begun stamping when I decided I wanted to fill the entire background with stamping, not just the top 2/3. So I sewed more lines. If you read what it says I basically copied and pasted my daughter's answers to her annual birthday questionnaire that I post on my blog. It's all about her favorites when she turned 5!
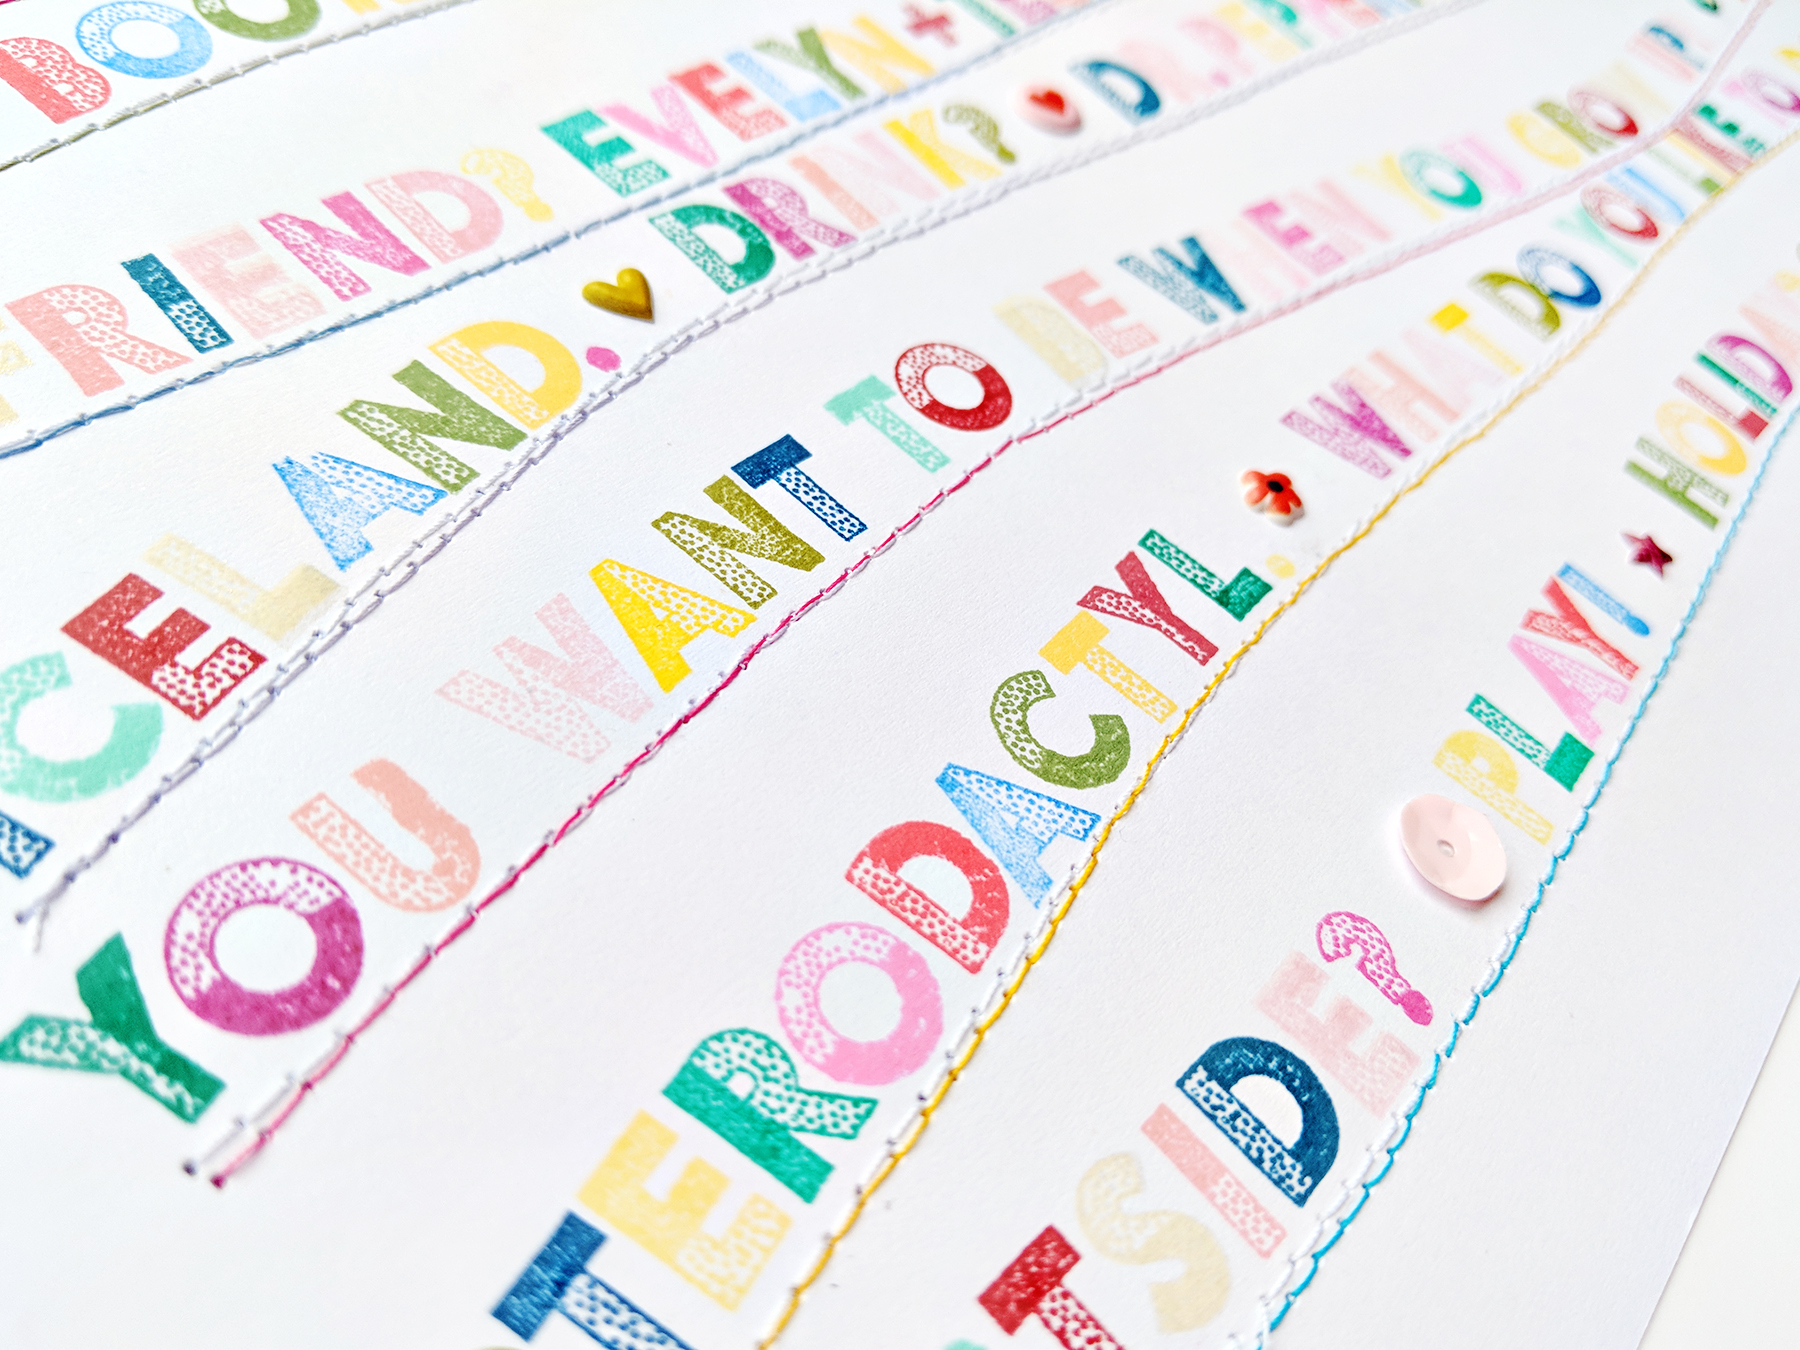
I left a little gap between each question/answer to add an embellishment. At first I used all of the buttons and bigger sequins from the Pick-Me-Up Haberdashery Multi-Pack. It took me a long time to figure out that those embellishments were taking away from the layout instead of adding to it, as much as I loved them! I replaced the buttons and larger sequins with tiny Puffy Stickers. Much better!
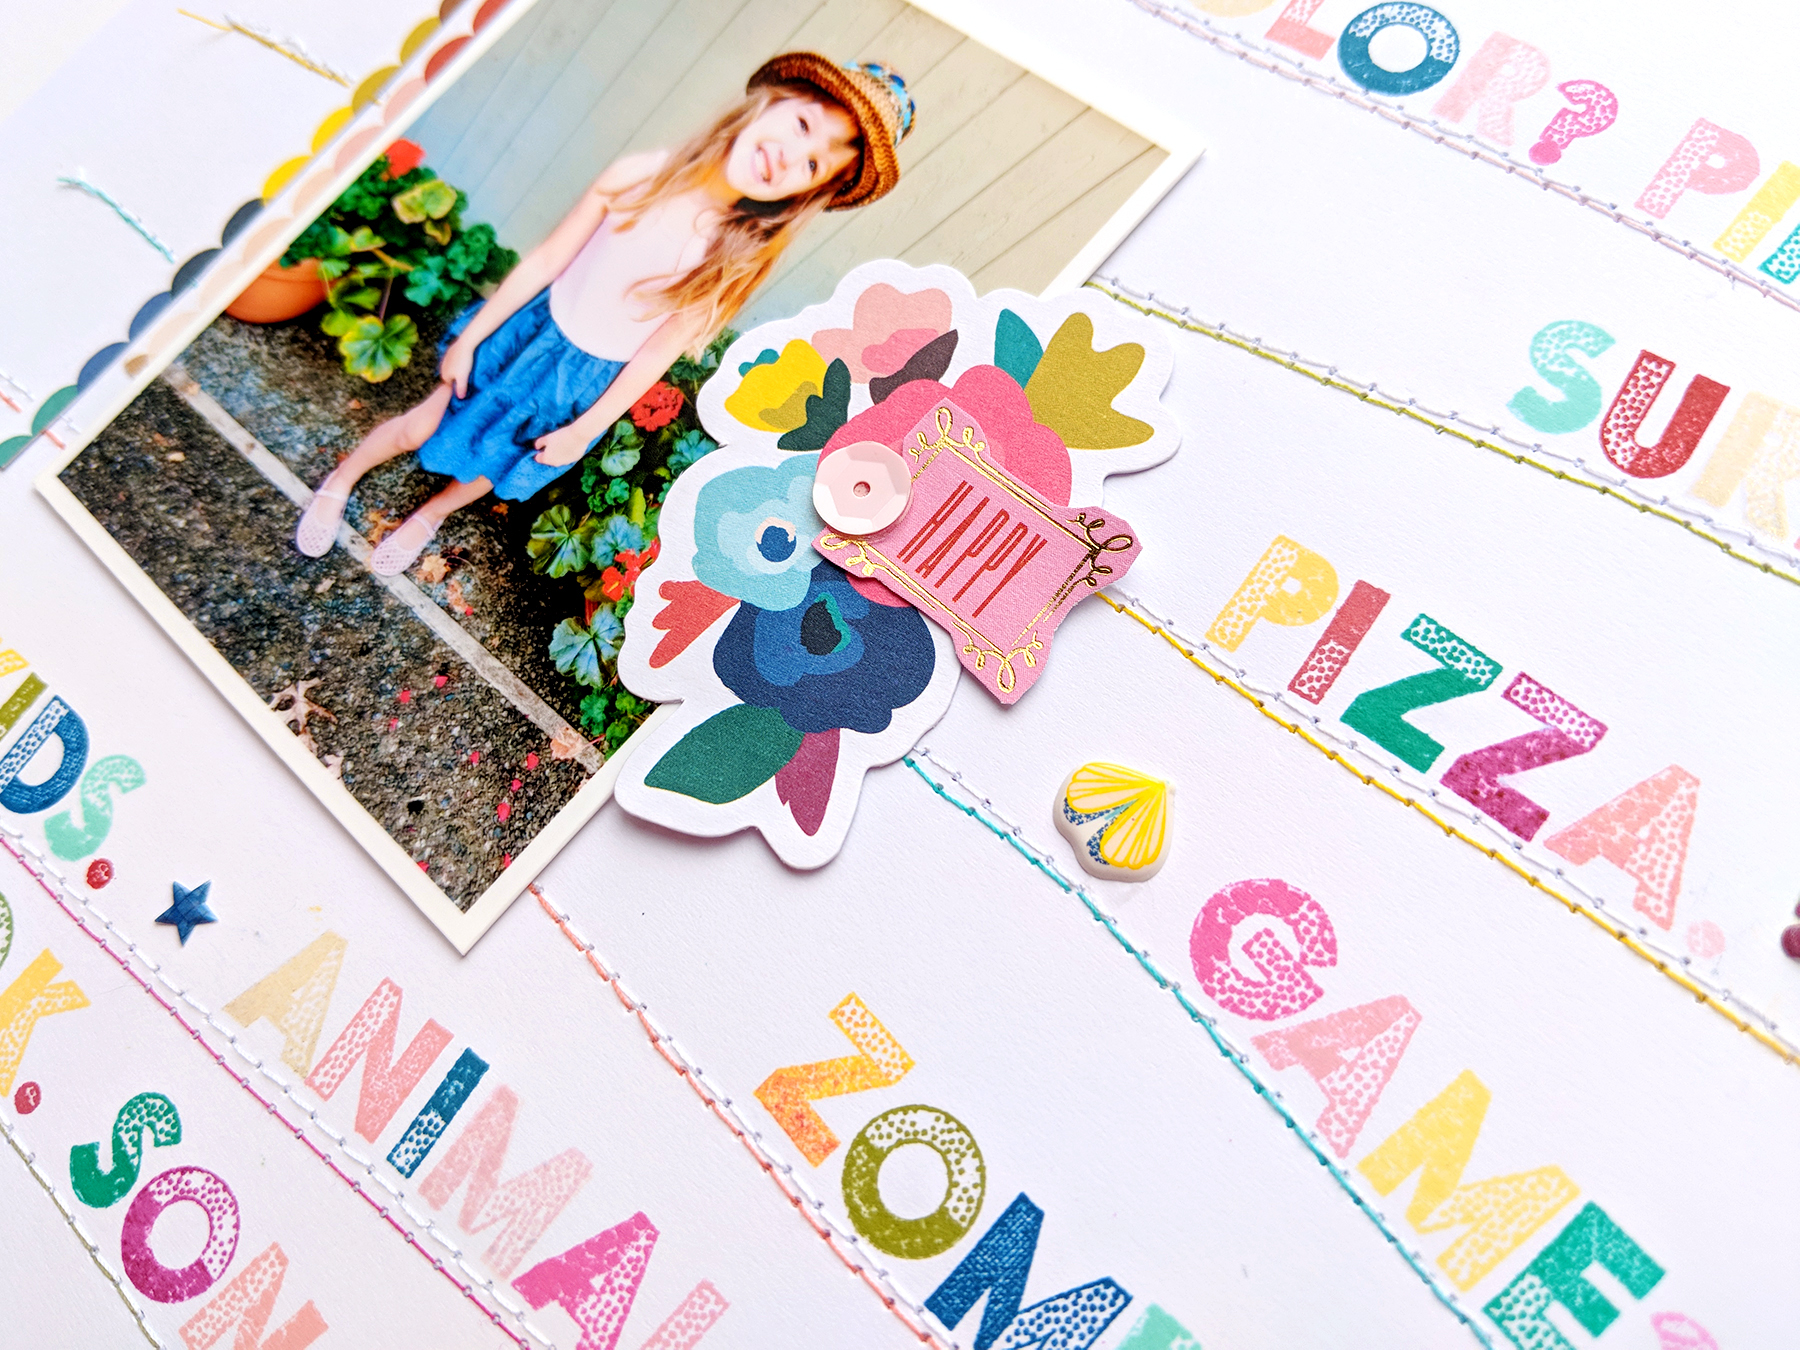
Something still felt like it was missing though so I decided to stitch colored thread lines directly below the white stitched lines. I think it helps the lines of stamping stand out more. There were also two colors of ink that I used that were really pale so I went over those letters with a darker color to help them stand out.
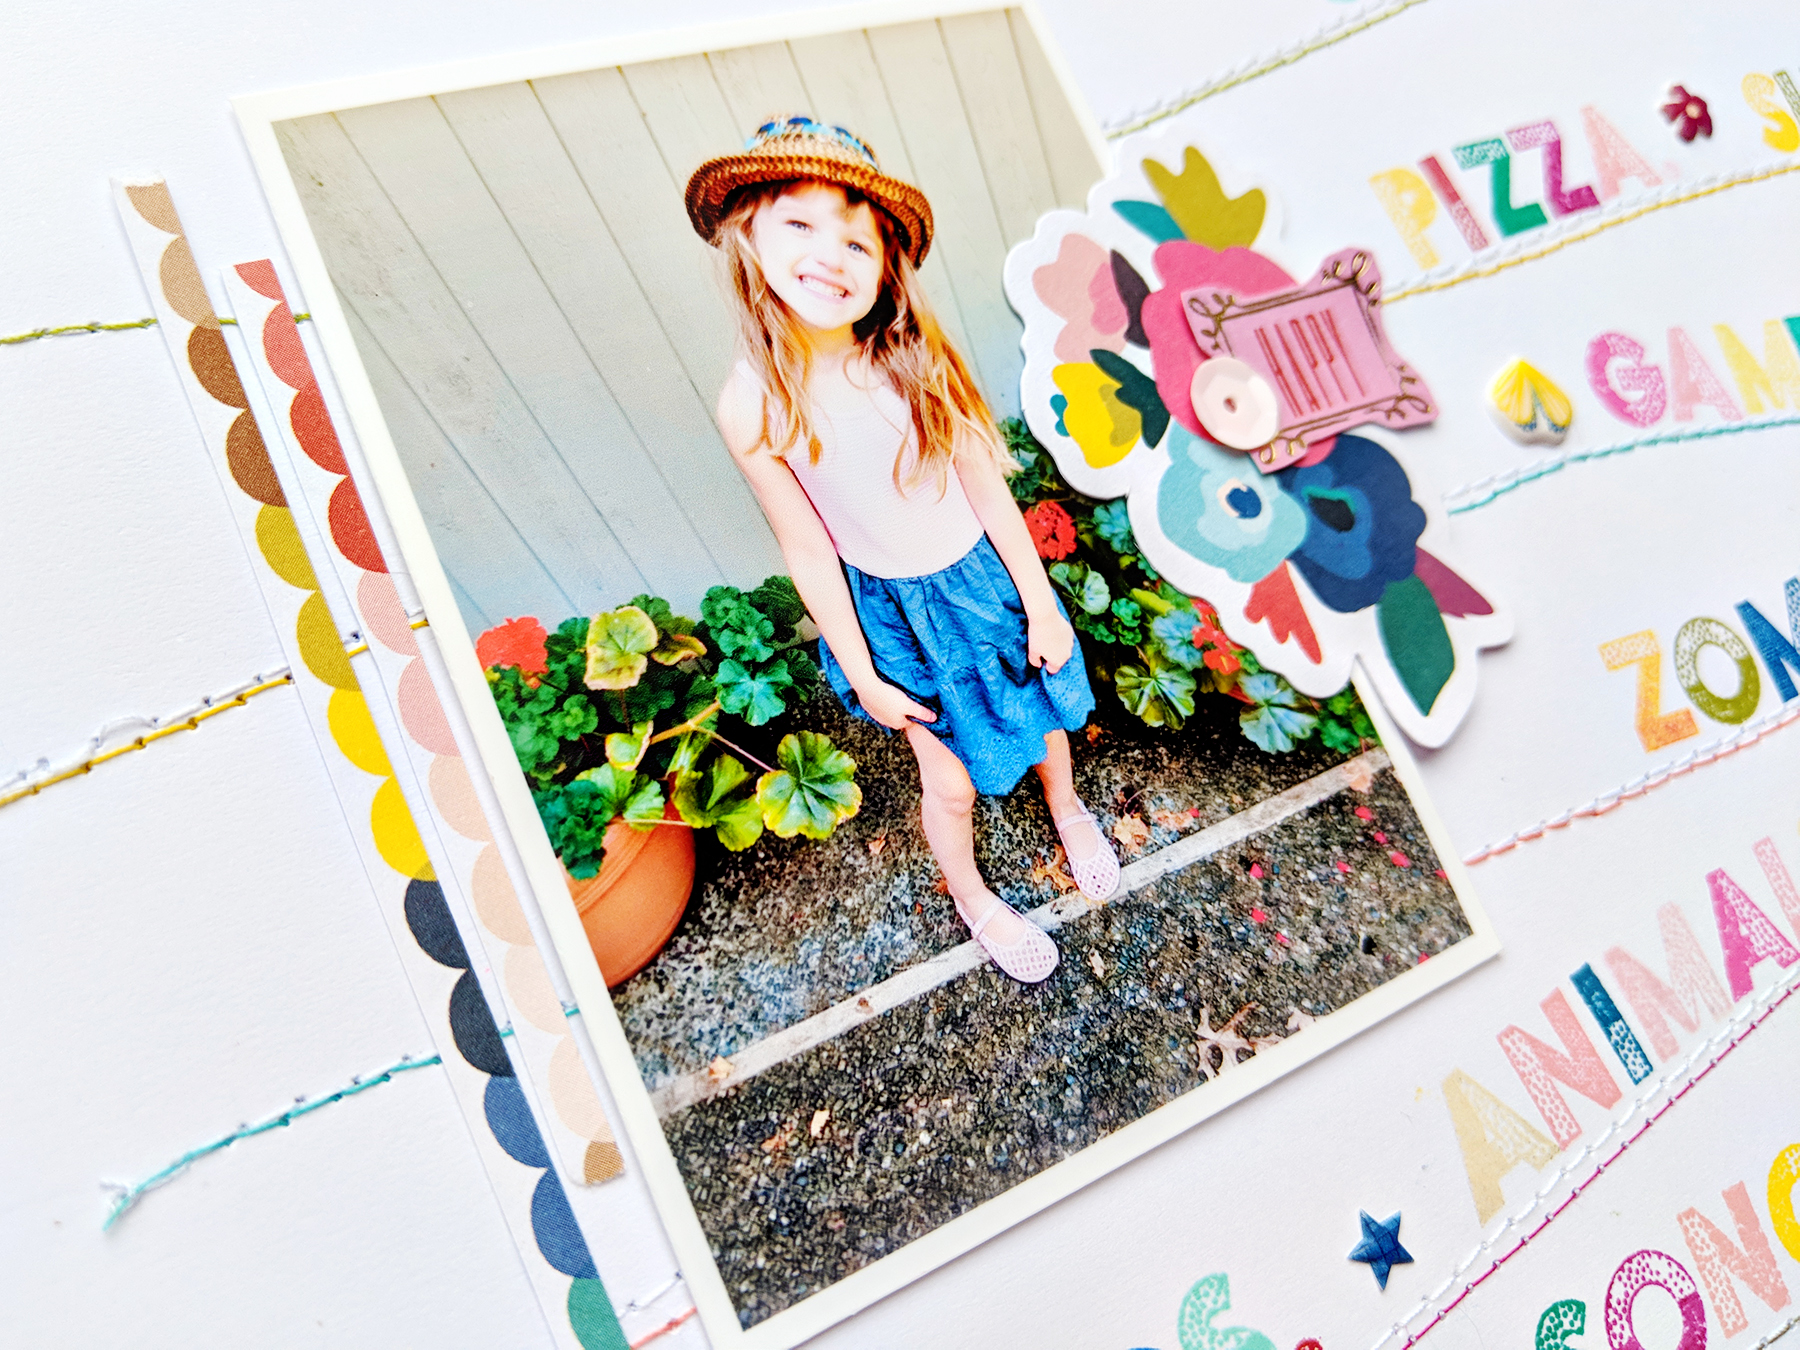
I started with three photos and wound up only using 1. Sometimes that's how it goes! Ya know I just realized I could have used washi tape and attached all three photos together to create a flip book... I am totally going to go back and do that! But anyway, to finish up the layout I added a floral Ephemera Die Cut, "happy" fussy cut from the 6x6 Paper Pad, a little pink sequin from the Haberdashery Multi-Pack on the right, and to the left of the photo I trimmed a tiny colorful scalloped border from one of the 6x6 papers.
I hope that you are inspired to try out the Pick-Me-Up Alphabet Stamps! They are so fun and versatile!


Oh my just gorgeous!!
ReplyDeleteso cute!!!!!!
ReplyDeleteWow wow wow!!! Once again, you have AMAZED me!! I loveeeeeeeeee this!!! Of course, I could have guessed the animal answer!!! LOL!!! Since I remember she chased them EVERYWHERE in Europe! LOL!!!
ReplyDelete