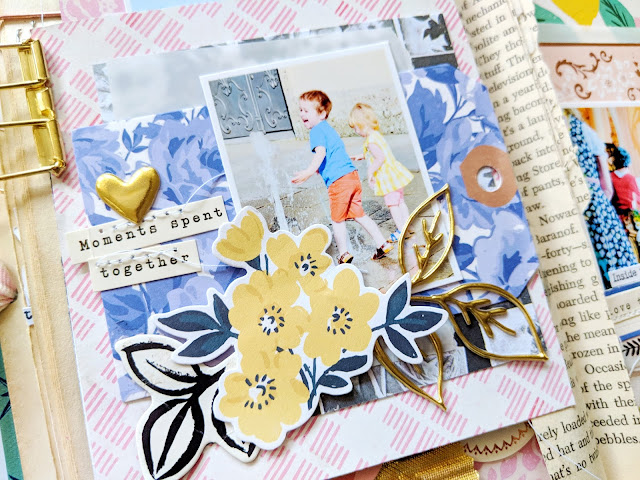
Have you ever come across a layout or card or mini album that was simply SO lovely and SO amazing that you just HAD to make one too? That's exactly how I felt when I saw this altered book by Maggie Holmes. I caught a glimpse of it in person at Creativation this past January and then she filmed the process video for Scrapbook.com a couple months ago using her new Flourish collection with Crate Paper. I immediately set out to find a vintage book to alter because I absolutely without a shadow of a doubt had to make a book just like it!
I searched high and low across etsy for a book to alter but could only find books in sets (I only needed one) or were something crazy like $30 for a single book. I put my search on hold for awhile to complete assignments and other scrappy projects. Then the first weekend in April we went with my parents to their house in Wallace, Idaho and while we were eating lunch at the Red Light Garage I saw that they had a bookshelf filled with old books for sale and found this one for $3. Sold! Even the cover pattern reminds me of a Maggie Holmes paper! It was meant to be :)
This past weekend I didn't have any assignments with pressing deadlines but I still had the urge to create so I got to work scraplifting Maggie's book as close to the same as possible - why change anything when I loved every single thing about hers? I did make a few pages of my own and not everything is placed exactly in the same place as Maggie's, but overall, it's identical; like taking an online class from her with a kit! Everything is from her Flourish collection with Crate Paper except a few things like vellum, the book paper (which just came from the pages I cut out) and all the ribbons.
On the cover I glued both kinds of Flourish Thickers to make the title then added a piece of crocheted ribbon and a chipboard heart sticker (peeled off the sticky back to make it thinner) below. To keep the book closed I used a Crop-A-Dile to make a hole through the front and back covers and then stitched two pieces of wide pink striped ribbon through that I tie into a bow.
Inside the front cover I added a flower die cut, glued a caption, and stamped the dates of our visit. All of the typed journaling throughout this book was made using the font Remington Noiseless which I printed onto smooth white cardstock and then trimmed into strips.
This page took a super long time because I had to trim and glue every single piece of journaling, but it was worth it! I love having information about our trip right in the front. I copied and pasted most of the text from our blog post recap and then printed it out as mentioned above. I added a flower to the corners first and then adhered the journaling around them.
On the next spread all I did was add three strips of washi tape, a branch sticker, and slid on a copper paper clip which I stapled in place to keep it from sliding off. I splashed gold mist over the pages for shimmer and shine.
Then we get to the pages! This one is a lift of Maggie's. I created all of the pages first, glued them into the book, and then figured out which photos to use.
I think the colors and patterns that we saw around Salzburg went with this collection perfectly. This spread and most of the following until the last few pages are straight from Maggie's beautiful book.
For an added detail on this page I slipped three tassels onto a paper clip and slid it over the edge - once again I stapled it in place so it's not going anywhere anytime soon.
This wood veneer frame page is one I went rogue on ;) I layered the frame over two pieces of a doily and clustered a flower die cut and puffy flower sticker over the bottom left side.
I really wanted to use the bird patch that comes in this collection so on this page I added a photo of Jane because she loves birdies.
I still had some room in my book for more pages so the rest of the spreads were designed by me but I attempted to make them in Maggie Holmes' beautiful eclectic style.
On the final pages that were left in the book I added a few embellishment clusters.
And on the last spread I layered stickers down the left edge and tried to leave some love around the "discarded" stamp.
That's a wrap! For Maggie's complete tutorial on how to make an altered book, visit the Scrapbook.com blog post and get ready to be inspired! I sure was!
SUPPLIES: Patterned paper, die cuts, Thickers, chipboard stickers, paper stickers, puffy stickers, dimensional stickers, gold leaf trim, washi tape, wood veneer frame, tassels, toothpick pennant, gold leaves: Flourish by Maggie Holmes / Crate Paper; Doilies, ribbon: Craft supply; Sewing machine: Brother; Thread: Coats & Clark; Book: Vintage; Hole punch: Crop-A-Dile


Wow wow wow!!!! This is GORGEOUS!! And $3.00!!! That's AWESOME!!! What a steal!! And that page with the adhered journaling?!?!?!?!? You are a better person than me, I have no patience for all that!! LOL!! But, I am glad you did it, cause it LOOKS AWESOME!!!!!!!
ReplyDelete