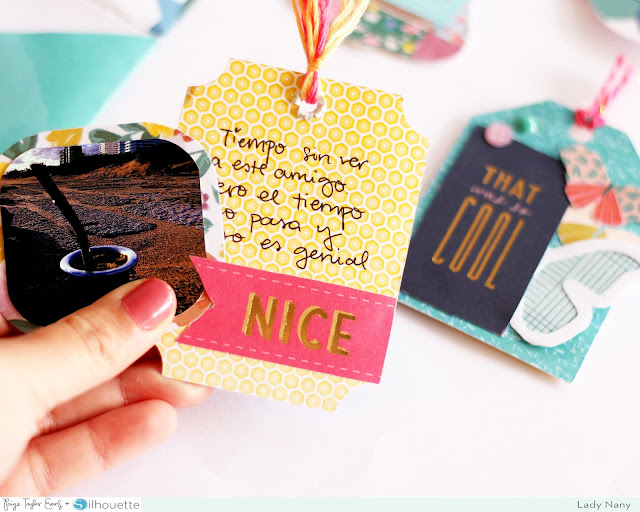
Lady Nany here today! I love the afternoons shared with friends that I haven’t seen for a long time. Especially if it’s to be in the sun and enjoy the view of the sea in my favorite city while we drink "mate" which is the typical drink of Uruguay. Where I live (Piriapolis) there are natural places nearby, so after talks and laughter I returned home with the need to remember this time shared.
If you're like me, you'll understand my love for mini albums and especially this one that I fell in love with as soon as I saw it: the Envelope Mini Album with Tags cut file which I combined with the Pick-Me-Up collection to create this fun project. To begin, I ungrouped the parts to cut them individually in my Silhouette at the same time I was choosing the patterned papers.
The great advantage of this mini album is that it contains two tags per envelope, but if you want to add more elements, anything is possible. So once the envelopes were glued (flap on the base of the next envelope) I started playing with the photos and tags.
Die cuts leftover from other projects come in handy for decorating the tags. I used a butterfly from the Butterfly Background cut file and sewed it by hand through the center.
From Paper 13 I selected a sentiment to fussy cut and combined it with a thread bow and an enamel dot. On the other side I wrote journaling and decorated the photo with Rub-Ons.
This project can be as versatile as you want and that means you can create interactive tags! I added turned one into a book that opens to the right.
Sometimes I like to make simple combinations to highlight the image. That's why a cut out with phrases (as a title) and a photo say it all.
And the text can be hidden in an card that unfolds downwards.
Or behind a "mini envelope" from a paper pennant. Here I played with digital elements from Pack 2 of Pick-Me-Up to frame the photo.
And then when opened there is more space to write and decorate!
On the small elements like hearts and bows I put glossy accent to give dimension and shine.
Finally, I decorated the tags with thread and that's it!
To close this mini album I made a small acetate folder and put a hole in the spine to hang a Heart Charm from Oh My Heart.
I hope this inspires you to create your own mini album using the Envelope Mini Album with Tags cut file. Thanks for reading! Bye bye!
SUPPLIES: Cut file: Envelope Mini Album with Tags by Paige Evans; Patterned papers: PICK-ME-UP; Die cut machine: Silhouette; white cardstock; enamel dots; OH MY HEART: Heart Charms


