Imagine Layout by Cristina Sales


Monday, December 31, 2018

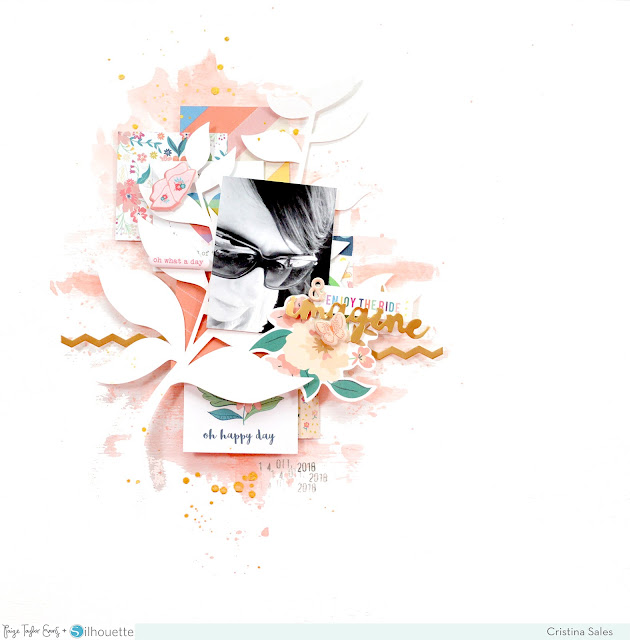
Hi friends! Cristina Sales here today! Happy New Year's Eve everyone! This is my last page made in 2018 - a wonderful year full of joy, creative events, many satisfactions, some changes in my life but being a creative lady helped me to go on, and now I just have to thank all of you for supporting me and my work. This is my page and for it I chose a Branch cut file, one of the most beautiful you can find in the Silhouette store made by Paige.
To emphasize the watercolor base, since the chosen color was also very soft, I decided to use the Whimsical 2x2 Paper Pads, choosing patterns and colors that are chromatically compatible with the base of watercolor. I created my composition with thickened double-sided adhesive and I wanted to overlap the various patterns chosen in a staggered way to give movement to the whole page.
I then cut the cut file using white cardstock then I added the photo and some floral decoration, Stickers and Puffy Stickers because flowers can never be missing in my projects. I didn’t add anything else because I didn’t want to make it all too heavy and leave the sense of lightness given by the soft color of the background. To match the gold of some stickers I added a few drops of gold shine and the date with a roller stamp. As always, I left a lot of empty space around the composition to give more attractive force to the picture and the surrounding decorations.
That’s it dear ladies, I hope you like my page!

Blog: Scrap and So On / Instagram: @cristina__sales / YouTube: Cristina Sales
Facebook Page: Scrap and So On / Facebook: Cristina Sales

Budding Artist Layout for Paige's Pages 17


Sunday, December 30, 2018

Here is the first layout from Paige's Pages 17 at Big Picture Classes!
I've made lots of layouts using this same technique before, but never in this exact way. No need to reinvent the wheel every time, choose a technique and evolve it using different patterned papers, sizes of butterflies, shapes, colors, etc. I placed the papers in rainbow order but I’ve also done a version with the colors in random order – both are awesome! Go in whatever direction you’re drawn to!
 I love to stitch down the middle of butterflies and bend up the wings for lots of texture and dimension. If you don’t have a sewing machine, that’s A-OK, you can totally skip that step! Just make sure to use a good, strong adhesive to attach all of the butterflies so they don’t fly away!
 Consider adding some mixed media to the background before adding the butterflies – splashes of white acrylic paint and watercolors would look lovely!

  The colorful Foam Mini Thickers from Whimsical match perfectly and because they're so small you can almost always find a spot for them somewhere on the layout! Find the start-to-finish process video and more tips & tricks over in Lesson 1 of Paige's Pages 17 at Big Picture Classes! :)
SUPPLIES: WHIMSICALPaper 05Paper 19Foam Mini ThickersEnamel ShapesSticker BookPuffy Stickers; Sewing machine: Brother; Thread: Coats & Clark; Butterfly punches: American Crafts, Fiskars, Martha Stewart Crafts

Be Brave Layout by Kim Jeffress


Friday, December 28, 2018

Welcome back to Paige’s blog! Today it's Kim Jeffress here sharing a new layout using the fun Scalloped Heart cut file. I love that it provides lots of areas to add multiple colored patterned papers. For this layout I used Paige’s Whimsical collection which is full of bright and fun colors. I began by cutting the cut file with some white cardstock. I then began trimming out the more boyish colors from the hexagons from a piece of Paper 05 and backed each scallop with various colors. I tried to make sure the colors were spread randomly but also evenly across the heart. I then added pop dots to the back of the scallops and laid it over some more white cardstock. Next I matted the white cardstock onto Paper 11 to echo the heart theme of the layout.
I added my photo then layered the clouds from the Chipboard Stickers and Stickers next to the photo, adding some of the heart stickers in and around too. I used my typewriter for my journaling then adhered the strips underneath the clouds.

I used some of the Foam Mini Thickers and Rub-Ons to add my title to the photo and completed my layout by adding more of the stickers and chipboard pieces in and around my photo.

Thanks for joining me here on the blog. Happy New Year to you all!

SUPPLIES: WHIMSICALPaper 05Paper 11Chipboard StickersStickersFoam Mini ThickersRub-Onswhite cardstock; Die cut machine: Silhouette Cameo; Cut file: Scalloped Heart by Paige Evans
Blog: Glass Half Full / Instagram: @kimjeffress / Pinterest: @kimjeffress / Facebook: Kim Jeffress Designs / YouTube: Kim Jeffress

December Daily 2018


Thursday, December 27, 2018

Today I'm sharing my December Daily 2018! This was such a fun project to work on this month and kept me motivated to go out and do things - I'm such a homebody now, I need a good push to get outta the house :) For those interested in the cut files I designed and used throughout this album, you can find the set by {clicking here}.
Here is a walk through of the album - I love seeing things in "real life" so you can see how it moves and even sounds!

It took me a long time to decide which format to create my album. Should I do traditional pocket pages? Create another coptic book? Make each page individually and bind them together somehow? I purchased a 6x8 album and everything (actually two!) fully intending to make a traditional album. I was still knee deep in other assignments at the beginning of December and hadn't even started yet by the 5th. Usually I at least have some foundation pages done by then! But I wasn't feeling very inspired or motivated to begin. Until one afternoon when I was lying in bed recovering from a cold I got the idea to make a Christmas tree-shaped album! It's been a year filled with shaped mini albums, why not continue that theme?! I was so excited to get started I immediately jumped out of bed to research exactly which tree shape to use. And so the idea for my December Daily 2018 was born.
All of the cute & festive charms are from Emily Inspired Designs. They are the perfect finishing touch for any book, project, or album! I love them and use them often on my mini albums.
The cover took me three whole days to stitch. Crazy? Yes. Worth it? Absolutely :) You know I'm a huge fan of hand stitching so I wanted to create something unique for the cover. I was browsing Pinterest for Christmas embroidery patterns and I saw colored blocks of of cross-stitching. Lots of colors? Sold! I took off all the washi tape rolls I've stored on my embroidery hoop, added fabric inside, and then cut a tree and traced it onto the fabric. I pulled out my embroidery threads and started at the top cross stitching diamonds and working my way down.

Once I was finished stitching I added the tiny jingle bells. I love the sound they make! I took the project out of the hoop and then cut another tree from chipboard. I used PVC glue and painted it onto the cover, wrapped the stitched tree around it, then trimmed the excess. It's definitely not perfect so don't look too closely, but I made it and I'm proud of it and that's what counts!
At the bottom of the cover I added a "fa-la-la-la" die cut which is a digital set from Cat Martin's Etsy shop. The colors of her Christmas collection mesh with my color-loving soul so you'll find lots of her cute designs throughout this album. And I added "2018" number stickers below.
To cover up the fabric on the back side I cut a tree from white cardstock and printed journaling on it. I used glitter glue around the border and then once it was dry I painted with Prima watercolors around the edges before using PVC glue once again to adhere it to the back side of the chipboard cover. Our Christmas card this year was super colorful - it's a pattern designed by Etta Vee. It was 5x7" and the album is about 6x8" so once I trimmed it roughly into the tree shape I replaced the missing areas with gold glitter washi tape.
On the left is the back side of our Christmas card and then the opening photo is a full-sized picture of our new Christmas tree.
I spent about three more days creating foundation pages including this fringed paper tree and embellishment pocket. For the fringe tree I went through my Christmas paper stash and pulled out all of the colorful papers I wanted to use this year, trimmed them into 3/4" strips, fringed them with specialty scissors, then layered them down a tree. I tucked two 2" photos into the fringe and added journaling made with a Typecast Typewriter. For the right page I trimmed a tree from a page protector, drew lines dividing it into section with a white pen, figured out what to place inside each section, and then machine stitched through the lines. I used a mix of all kinds of Christmas lines and December Daily kits.
I wanted the pocket page to be light and bright so behind it I added a white cardstock tree that I covered with snowflakes made with a stencil and modeling paste. Super simple and effective.
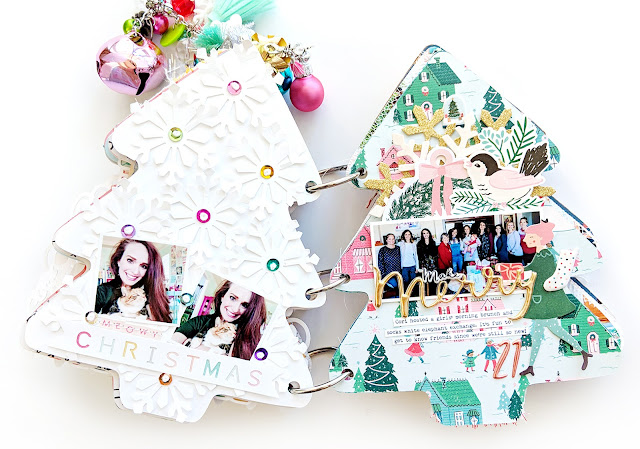
This spread is all about the first snow, which happened way back in October! On the left page I die cut my snowflake design about six times from textured white cardstock then layered them over a white tree. This creates a fun texture. I layered three photos down the center and called it good. The right page is a blue plaid tree and I added one more die cut snowflake at the top along with journaling, "1st snow" stickers on a label, a "2" number sticker, and I added a snowflake paperclip to the top.
For day 3 I documented making gingerbread houses. I dangled die cut ornaments from the top of a kraft polka dot tree with a chain link stitch and then layered two photos over a hidden journaling spot.
I made a string art tree on a transparency. I simply die cut a tree from a transparency, poked holes all around the edges, and then used ombre green thread to stitch all around and then back and forth all over it. On the front I added a picture, title, and die cuts.

The back of the string art tree has two small photos of the kids picking their 2018 ornament and I tucked a journaling tag behind the pictures so it creates a little interactive element.
For the 6th day I asked the kids to write their wishlists on trees that I die cut from 6x8 lined papers from a December Daily kit.
We went and saw the most epically decorated house called The Gingerbread House about 3 minutes away. WOOOW! I used a stencil and modeling paste on the red paper background to create a texture and then layered on fun embellishments.
Every Sunday we get together with family and one night it was our turn to host dinner. Jane and her cousin Quinn sat in front of the tree and looked oh so cute. This page is minimally decorated with a photo, enamel dots, die cuts, pins, etc. It's all about the layers here!
I used my Whimsical Foam Mini Thickers and Enamel Shapes to create Christmas words on a tree for a fun filler page.
Day 9 is Jane looking cute and asking me to take pictures of her. How could I say no?! I used a colorful gumdrop paper for the tree and layered all kinds of die cuts, stickers, and two photos on the edge. I stapled a felt star to the top and used a Typecast Typewriter to create journaling strips. 
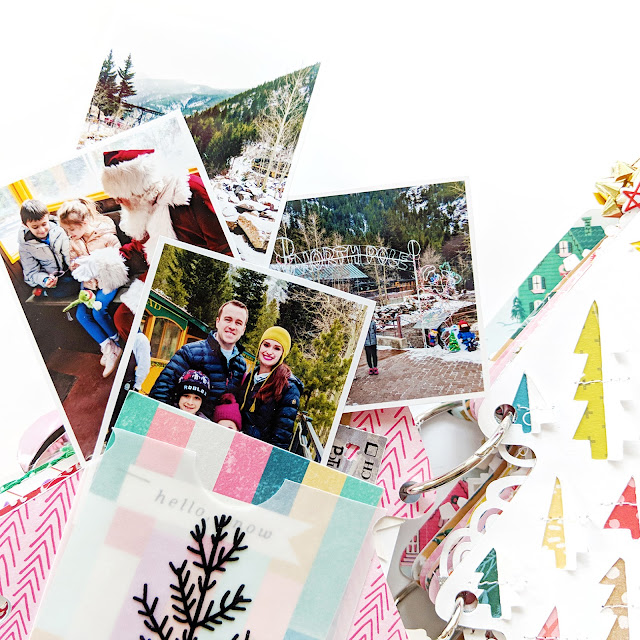
Sometimes I had too many pictures to include on a single day so I had to think of a solution. For day 10 I used a vellum pocket (I believe it's from the Merry Days collection) and tucked in our ticket from the train ride, a tag with journaling, a colorful die cut, and several 3x4" photos.
The contents inside the pocket:
For this filler page I modified one of my cut files to fit a tree and then backed it with the same papers I used for this book. To help the trees stay open I machine stitched across each one.
I LOVE the Great British Baking Show and binge watched all the seasons this December. The holiday edition rocked my socks so of course I had to document it! I had some food type wood veneer shapes which I thought went along with the food theme. I journaled around the edges with a white pen. Between days 11 and 12 is one of my die cut trees. I created tabs for it with silver washi tape so it would fit nicely in the binder rings and added a puffy star sticker to the top.
FYI - the photos in my December Daily are not in any sort of chronological order. December 1st was Chris's work party but it's documented as day 12 here. It's all good! I don't think the order is important, it's the stories that are getting told :) I cut a tree from red/pink striped paper, used my Typecast Typewriter to write journaling, and placed washi tape strips between the lines.
This was one of my favorite pages to make: I cut a tree from white cardstock, machine stitched with lots of different colors of thread in stripes across it, then topped it with sequins! I added a photo with a hidden journaling tag behind it.
The right page is day 14 which is a little photo of cute Jane. I backed my candy cane cut file and used it as the focal point.
I had lots of photos from our night at the Zoo Lights and the lighting event of downtown Littleton. So I trimmed one of my photo banner cut files into a few rows, backed the frames with little photos, and layered them across a blue tree. On the right page I die cut my lightstrand border into strips then added photos across the tree. Journaling is hidden under the top photo.
When in doubt - repeat a shape! Here I used all kinds of stars on a pink tree along with two photos and typed journaling strips.
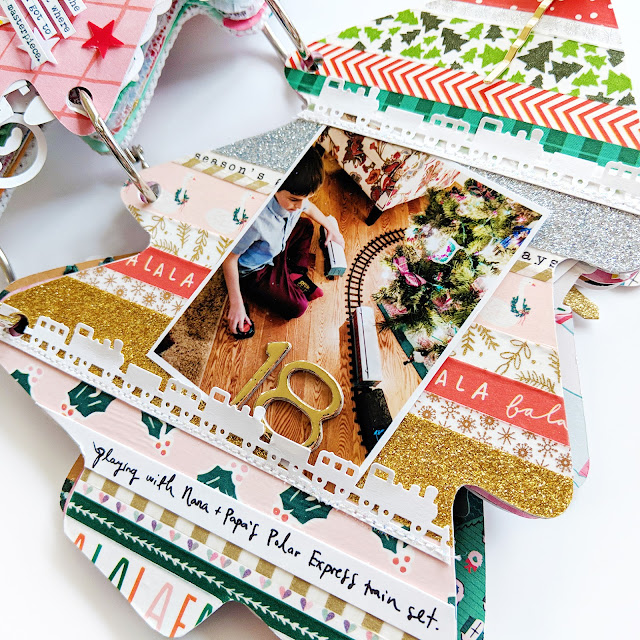
I layered washi tapes across a white tree and used a train border punch to emphasize the photos of Fox playing with a train set.
I backed my gingerbread cut file with colorful papers and tucked a photo of Jane holding the very same cut file into the top. I hand stitched over a "joy" word, cut it out, then added it to the right page about all the pink trees I've collected.

I had another vellum pocket which I used for photos and trinkets from the Nutcracker Ballet. The nutcracker on the front was fussy cut from the program.
On this filler page I embroidered the leaves on this paper from the Merry Days collection.
I punched snowflakes from white cardstock, stitched a sequin to the middles with a French Knot, and layered them across a white tree. The right page is layers of die cuts and stickers also from Merry Days and other Crate Paper Christmas collections.
I went to Fox and Jane's class Christmas parties and used similar techniques and supplies to document both. I used a stencil, modeling paste, and watercolors to create mixed media backgrounds, layered photos over a doily, and added a few stickers for decoration.
I edged the bottom of both trees with ribbon and trim.
For day 23 I stamped all the journaling and added sentiment stickers here and there. We took a family portrait on the Sunday before Christmas so I printed it full sized and trimmed it into the tree.
I always have lots of photos for Christmas Eve so I created die cut flaps and put the photos and journaling under each flap. It says "merry christmas eve" on top of the flaps with a mix of stickers. For day 25, Christmas Day, I filled a transparency tree pocket with lots of glitter and stitched around the edges.
Here is a look at what's under some of the flaps:
I also had lots of photos for Christmas so I turned them into little "presents" that you have to open. Each present has a trifold of photos which stay closed with bits of string.
Here's a look at two of the photo presents:
I had so much fun documenting our December memories in this album! I'm already looking forward to next year! Let me know if you have any questions about anything, I'm more than happy to answer! I'll leave you with a few more detail shots:
Merry Christmas 2018!
Paige Taylor Evans © // Quinn Creatives DESIGN