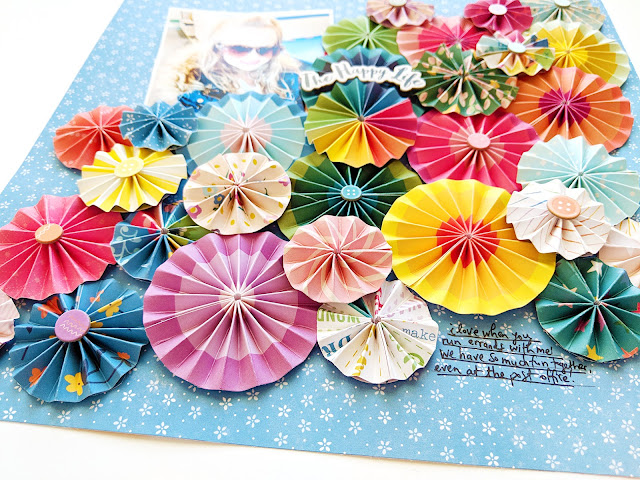
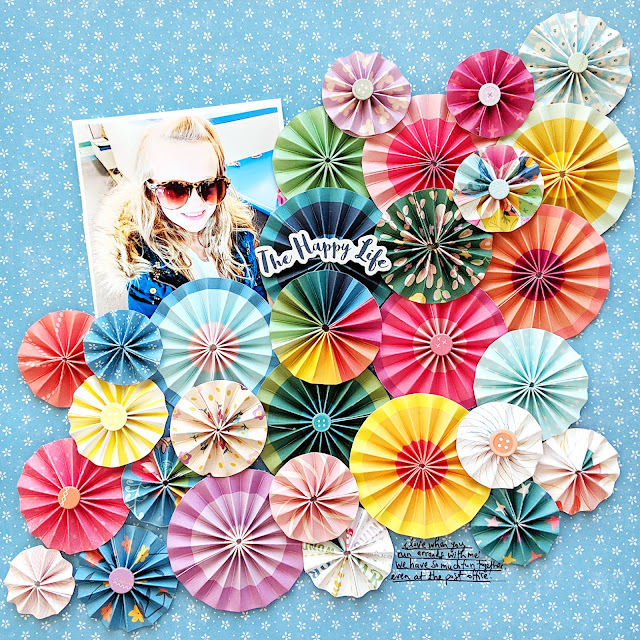
Hey everyone! I have a new layout to share today featuring folded paper rosettes made with my Whimsical collection.
I started by creating about 30 folded paper rosettes which you can see how to make in this short'n'sweet process video:
It took a few hours to make all of the rosettes but they're so addicting to create - once I started I couldn't stop! Then I had to choose a background for my page and I chose this blue design with tiny white flowers (the B-side of Paper 23) - it helps bring out the blue tones in the picture.
I glued the rosettes onto the background in a diagonal from the top right to the bottom left, starting with the largest ones and then adding the smaller ones on top.

I tucked the photo into the top left side and then added a title "The Happy Life" Chipboard Sticker beside it. Since there was already so much color, dimension, and patterns going on, I kept the embellishments to a bare minimum and only added some Chipboard Sticker dots and button Stickers to a few of the rosette centers.

The final step was writing journaling on the bottom right. All done!

I hope you are inspired to learn how to make these folded paper rosettes and use them in a fun and unique way on your projects!

SUPPLIES: WHIMSICAL: Paper 01, Paper 02, Paper 03, Paper 04, Paper 05, Paper 06, Paper 07, Paper 08, Paper 09, Paper 10, Paper 11 , Paper 12, Paper 13, Paper 14, Paper 15, Paper 16, Paper 17, Paper 18, Paper 19, Paper 20, Paper 21, Paper 22, Paper 23, Paper 24, Chipboard Stickers, Stickers


Wow wow wow wowwwwwwwww!!! This is STUNNING!!! I am IN love with those rosettes!!! GORGEOUS!! And loving that sweet photo of Jane!!!!!
ReplyDelete