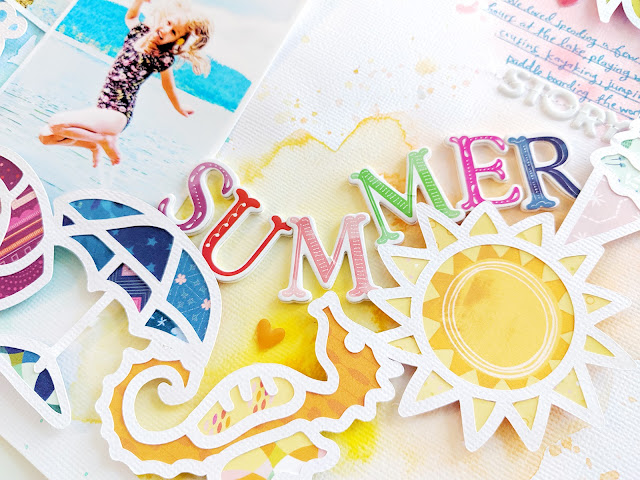
A question I get asked a lot is "How do you back a cut file?" and so I thought I'd do a video tutorial showing how to do just that! For this layout I'm using my Summer Wreath cut file which you can grab for free in my Happy Scrappy Place Facebook Group paired with my brand new Truly Grateful collection + a pinch of patience and a dollop of fun!
First things first - the tutorial!:
I started by die cutting my Summer Wreath cut file from American Crafts white textured cardstock using a Silhouette Cameo 3 and then carefully peeled it off the mat. My mat is well used so not very sticky which made it much easier to peel off. But take your time to make sure the intricate design doesn't rip or tear. If it does, carefully put it back together with liquid glue. Then I grabbed another sheet of 12x12 American Crafts white textured cardstock and pooled water in a circle onto it. I didn't prime it with gesso or anything first, just straight up added lots and lots of water. Then I dabbed, dropped, and splashed my favorite watercolors (Pastel Dreams by Prima) into the water and let them blend together. Instead of speeding up the drying process with a hair dryer like I normally do, I set the background aside and let it air dry - this creates a really cool effect in the watercolors.

While the background was drying, it was the perfect time to go ahead and back the cut file! In the process video I show three different techniques for backing an intricate cut file such as this Summer Wreath. For cut files that don't have as many different-sized shapes or for shapes that are all the same, you can actually have your Silhouette Cameo 3 cut the backing pieces for you which I show how to do in this process video.

It took about an hour, maybe two hours, to back the entire cut file by hand. I used three different patterned papers from Truly Grateful to do this since they had ALL the colors and ALL the patterns. The more color and patterns the better! I used Paper 08, Paper 09, and Paper 14. To help making picking and choosing the patterned papers I wanted to use faster & easier, I cut up all the different colors and patterns into their individual pieces and assorted them into piles in rainbow order.

The background finished drying, I finished backing the cut file - next step: adhere the cut file onto the background. To do this I used tiny adhesive foam squares to lift the wreath off the page and create dimension and shadows which you can see in the detail photos. I love this little bit of depth foam adhesive adds and it doesn't make your layouts very bulky at all.

Time to add photos, embellishments, and journaling! I printed two 3x4" photos and trimmed them out leaving a white border then overlapped them into the wreath on the bottom left side. I used the Truly Grateful Thickers to create the title "SUNSHINE SUMMER" and tucked them along the shapes of the wreath. I wrote journaling with a blue pen on the right side and stitched "STORY" letters from the Puffy Phrase Stickers underneath. I added heart enamel stickers from the Mixed Embellishments tone-on-tone around the wreath and finished with a sun stamp die cut from the Ephemera Die Cuts and a "shine bright" sticker from the 6x12 Stickers between the photos.

I hope you are inspired to try backing a cut file! (Be sure to grab this one from my Happy Scrappy Place Facebook Group!) It may be a bit time consuming, but the results are always worth it. Plus it's a great way to add lots of colors and patterns to your pages and feature a favorite scrapbook collection. Also note how I used my fall-themed Truly Grateful collection to create a summery vibe! By picking and choosing select patterns and colors, this collection can be adapted for almost any theme. I'm excited to create Christmas pages and projects with Truly Grateful :) Challenge accepted!
SUPPLIES: TRULY GRATEFUL: Paper 08, Paper 09, Paper 14, Thickers, Puffy Phrase Stickers, Mixed Embellishments, Ephemera Die Cuts, Stickers; Watercolors: Prima - Pastel Dreams and Tropicals; white textured cardstock; Die cut machine: Silhouette Cameo 3; Cut file: Summer Wreath by Paige Evans


Wow wow wow!!! You never cease to amaze me!!!! This is STUNNING! I love love love those photos and loveeeeeeee that summer themed wreath!!! Just GORGEOUS!!!!!
ReplyDeleteHi Paige! Having fun visiting my talented team mates tonight, their work is beyond inspiring, and to have a closer look at your crazy awesome wreath layout. Now that I've got some Truly Grateful, it's fun to recognize which papers you used for each summer item around the wreath! So many fun details, including the straws and parasol in the drink, LOL, I love that! Cheers xK
ReplyDeleteLove this Summer Diecut. Do you only use a Silhouette to do your page dies? Unfortunately, I only have a Cricut, but I love this!!!
ReplyDeleteHi, what kind of glue do you use for backing your cutfiles?
ReplyDeleteHello! I use tombow mono glue :)
Delete