
Hey crafty, scrappy friends! Amber Mitchell here on the blog today to share with you another fun mini album featuring Bloom Street and Paige's cut files! I created this adorable spring mini using an embroidery hoop base. This album came together in just a few hours and I'm so excited to add photos to it!

The base of this mini album was created using a teeny, tiny 3" embroidery hoop. I opted to paint the hoop itself a soft, light pink to really tie the spring theme together. It took a couple of coats to get it opaque and I love the uniform look it gives the album. Not to mention, the pastel pink matches the similar tones in Bloom Street perfectly!

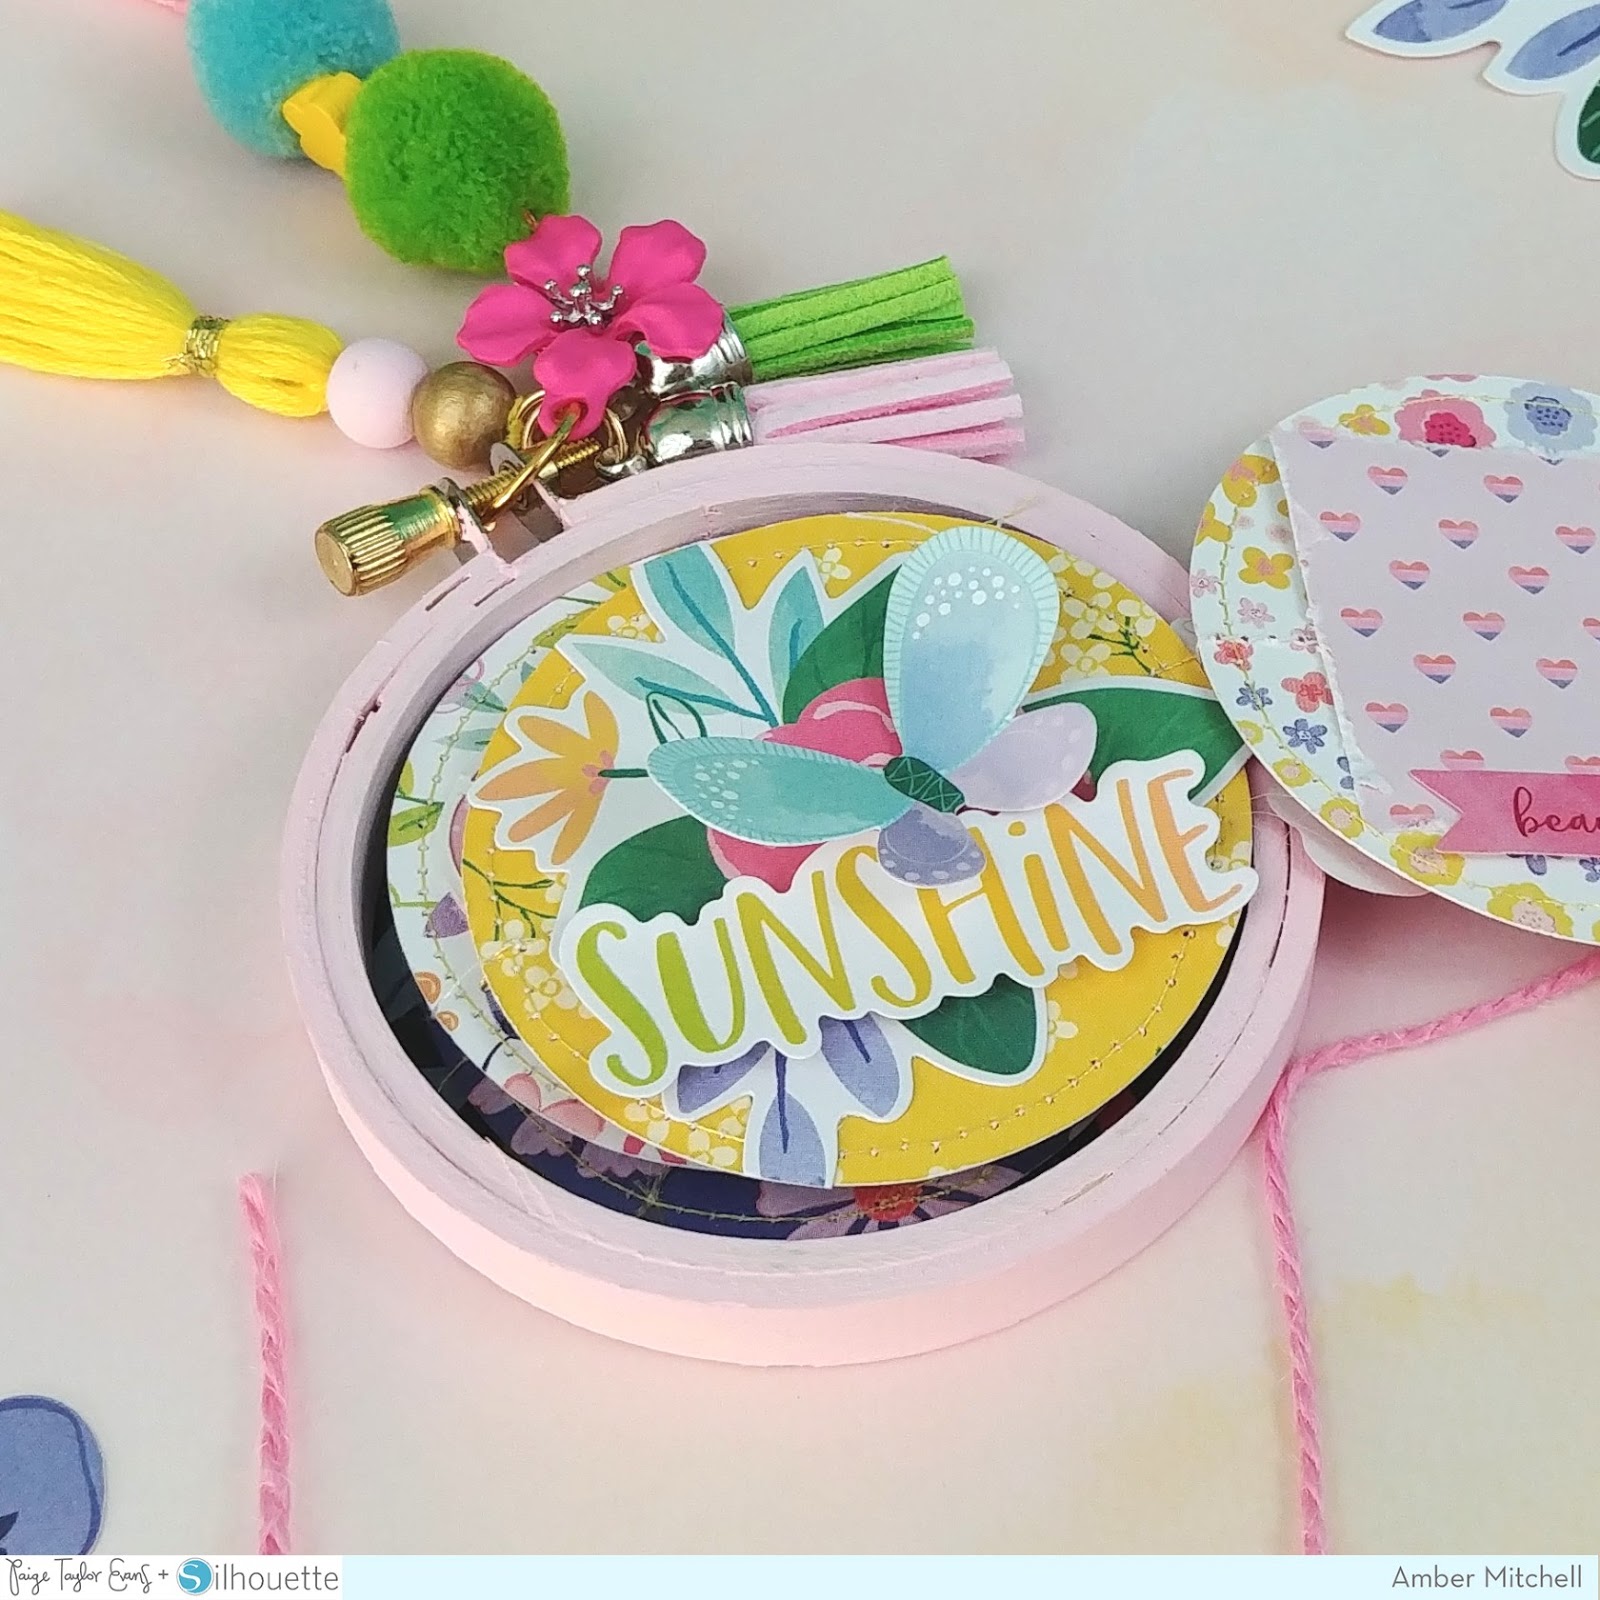
After this, the first step was to create the back cover of the album. To do this, I cut a 3.25" circle from Paper 02 and glued it along the back edge of the hoop itself. Next up was the front cover. I cut another 3.25" circle, this time from Paper 12, and layered the Spring cut file on top of it. I used a pretty pink polka dot paper from the 6x8 Paper Pad to back this file. I love how the pattern and color of this paper pops when near the pink hoop.

The pages of this album are made up of five double-sided 2.5" circles. I stitched these together in a line format, leaving a small bit of thread in-between each one. This allows the circles to fold either way onto one another to create accordion pages. A ribbon or string could be used to achieve a similar effect. I then used foam tape to adhere the two outside circles to the covers of the album. I added one to the back of the front cover and one to the front of the back cover.

Time for photo mats and decorating! I created four photo mats for this album using the 2x2 Paper Pads. I cut four of the small sheets into even smaller pieces that measured 1 5/8 by 1 5/8". I then distressed the edges of those using scissors to make them pop and adhered them to every other page of the album.

To embellish this album I used a bunch of tiny bits from Bloom Street. The 4-Page Sticker Book and the Cardstock Stickers had some great pieces to choose from. I also pulled some smaller pieces from the Floral Die Cuts as well as some Layered Butterfly Stickers. I also used the Pie Chart Heart cut file to create an embellishment cluster on one of the pages. Since my pages are so small, I sized this cut file down to about 2" in width.

For the cover, I created a tab using a WeR Memory Keepers Tab Punch. This will aid in pulling the album open for viewing.

The last step, as per usual, was to add tassels and charms! I used one of the tassels from the Tassels pack along with a charm from the Flower Charms pack. I then added a few more tassels from my stash and added some twine to hold the album closed and that's the project done!

Thanks so much for stopping by the blog today! I hope you feel inspired to try to make an album from something unique or different like an embroidery hoop! Take care and happy crafting!

The base of this mini album was created using a teeny, tiny 3" embroidery hoop. I opted to paint the hoop itself a soft, light pink to really tie the spring theme together. It took a couple of coats to get it opaque and I love the uniform look it gives the album. Not to mention, the pastel pink matches the similar tones in Bloom Street perfectly!

After this, the first step was to create the back cover of the album. To do this, I cut a 3.25" circle from Paper 02 and glued it along the back edge of the hoop itself. Next up was the front cover. I cut another 3.25" circle, this time from Paper 12, and layered the Spring cut file on top of it. I used a pretty pink polka dot paper from the 6x8 Paper Pad to back this file. I love how the pattern and color of this paper pops when near the pink hoop.

The pages of this album are made up of five double-sided 2.5" circles. I stitched these together in a line format, leaving a small bit of thread in-between each one. This allows the circles to fold either way onto one another to create accordion pages. A ribbon or string could be used to achieve a similar effect. I then used foam tape to adhere the two outside circles to the covers of the album. I added one to the back of the front cover and one to the front of the back cover.

Time for photo mats and decorating! I created four photo mats for this album using the 2x2 Paper Pads. I cut four of the small sheets into even smaller pieces that measured 1 5/8 by 1 5/8". I then distressed the edges of those using scissors to make them pop and adhered them to every other page of the album.
To embellish this album I used a bunch of tiny bits from Bloom Street. The 4-Page Sticker Book and the Cardstock Stickers had some great pieces to choose from. I also pulled some smaller pieces from the Floral Die Cuts as well as some Layered Butterfly Stickers. I also used the Pie Chart Heart cut file to create an embellishment cluster on one of the pages. Since my pages are so small, I sized this cut file down to about 2" in width.

For the cover, I created a tab using a WeR Memory Keepers Tab Punch. This will aid in pulling the album open for viewing.

The last step, as per usual, was to add tassels and charms! I used one of the tassels from the Tassels pack along with a charm from the Flower Charms pack. I then added a few more tassels from my stash and added some twine to hold the album closed and that's the project done!

Thanks so much for stopping by the blog today! I hope you feel inspired to try to make an album from something unique or different like an embroidery hoop! Take care and happy crafting!
SUPPLIES: Patterned papers, stickers, die cuts, charm, tassel, embellishments: BLOOM STREET; Die cut machine: Cricut; Cut files: Spring and Pie Chart Heart by Paige Evans

Location: California, USA / Blog: Happy Crafty Studio / Instagram: @bambismail / YouTube: bambidearr / Pinterest: bambidearr


This is soooooooooo clever! I love love love love it!!!!!!
ReplyDeleteAmber ! You are such a clever clever girl ! Building around that tiny hoop is just so creative and of course there's the perfect spot for the tassels and charms. Love your imagination for pretty things 💕
ReplyDelete