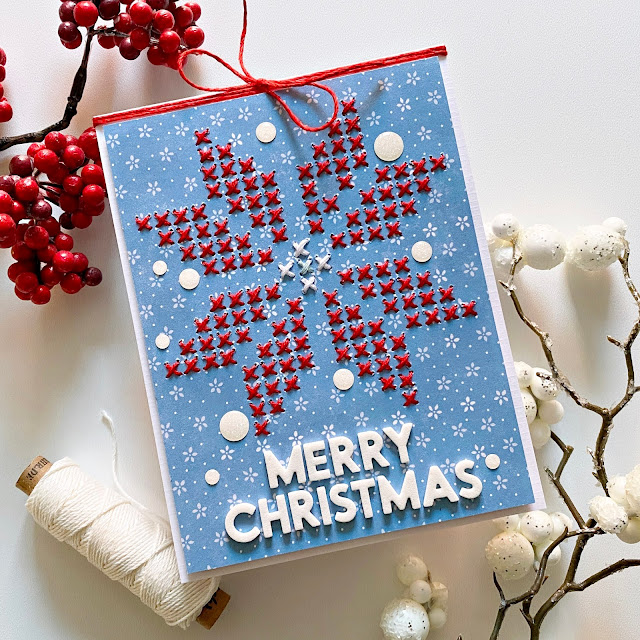
Hi there friends, Zsoka Marko stopping by today to share my latest project I've created for the Paige Evans Design Team. Today I have some more Christmas cards to share with you! There's still time to create some last minute Christmas cards to send out to loved ones. These ones are really simple and don't take very long to create either. I mean, compared to most cards I make anyway :)
I noticed that Paige has a bunch of cross stitch cut files for Christmas, and I was really in the mood to stitch, so that got me thinking, why not make cards instead of a layout for today's post? First, I selected the following cut files: Cross Stitch Reindeer // Cross Stitch Poinsettia // Cross Stitch Deer // Cross Stitch Snowflake. I then sized them to fit onto a 4 x 5.25" panel and die cut them out of white, heavy weight cardstock. I used these as templates to poke holes in the patterned papers. I recorded the process, so you can check how I did this in the video at the bottom of this post. Basically, these cut files are not stitching cut files, but it's super easy to use them as templates to achieve the same result. Eventually, I didn't use the Snowflake because in the size I wanted it, it was too small.
I searched for some patterned papers, that I thought would work. I found the three I used in the Whimsical collection. I cut them down to 4 x 5.25" and started poking holes. Once done, I stitched them all with white/light blue/red/beige/brown embroidery floss. Something I only noticed while editing the video (not even when I was editing these photos), is that I missed a stitch on this red poinsettia. I have no idea how I didn't notice earlier?! At this point I can't add it anymore, so I'll have to embrace imperfection once again :D
I added adhesive foam to each of the stitched panels and glued them onto 4.25 x 5.5" top folding card bases. The blue panels on white card bases, the beige ones onto kraft bases (well technically only the card front was kraft, the card base was still white - see video).
I was struggling with the sentiments because I'm not quite used to using Thickers for this purpose and also, I just couldn't find the right letters in the right colors. There are actually 2 packs (Truly Grateful and Pick Me Up) that have the right color (red), but I didn't have the right letters anymore. Only the white foam mini alphas are Paige's, from the Pick-Me-Up collection. Otherwise, I had to resort to my stash of AC Thickers. Of course you could stamp your sentiments, but I only wanted to use scrapbooking supplies on these cards, if that makes sense? Since most of these are quite large, I opted for shorter sentiments. I would have loved to have Peace on Earth instead of Peace, but there just wasn't enough space.
Last but not least, I added enamel dots and some twine to my cards to finish them off.
As you see, you really don't need a lot of tools or expensive supplies to make these cards. You can just use whatever you already have in your stash!
Here is the process video: https://youtu.be/YA95yRzAPyA
I hope I could give you some ideas with my projects today! Thank you so much for stopping by and have a wonderful day!

Blog: apocketfullofscrap.blogspot.com // Instagram: @zsoka_marko // Facebook: Zsoka Marko // YouTube: Zsoka Marko


OMYGOODNESS!!!! These are FABULOUS!!!!! Loving that stitching!
ReplyDelete