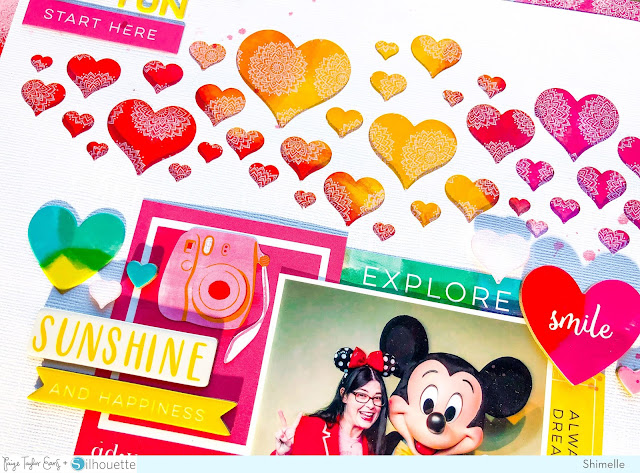
Hello crafty friends! Shimelle here today and I have a silly secret to share with you: I started making this page to make a Valentine's Day layout, with the Hearts Border cut file and lots of different heart shaped items from Paige's Go the Scenic Route collection. And then my husband said no to every photo I suggested for the page! Mickey is significantly less shy, so I have a mouse on my page instead, but I promise you can create a page design just like this for whomever your Valentine might be this year!
I started by placing the Hearts Border cut file about a third of the way down the page and shrinking it just a bit to allow for some room at the sides. I cut that from white cardstock and kept my small hearts to one side to use them for layering later. I trimmed 1/4" from each side of the white cardstock and backed it with a bright paper to fill the hearts and the outside frame. I used Paper 6 from Go the Scenic Route.
I used just one 4x4 photo and off-set it with a 3x4 cut out from the Horizon collection, but you could easily use two photos in the same place. All the layers work together to form a diagonal line from the top left to the bottom right corner, and everything sits squarely on the page rather than at angles to each other. Have a look for all the hearts you can find in your stash: I used Chipboard Stickers, Cardstock Stickers, Puffy Stickers, Enamel Dots, and the white cardstock hearts leftover from the cut file, with plenty of pink ink on their edges for definition. There are also three Puffy Phrase Stickers scattered throughout that diagonal.
The spectrum can also help with the placement of embellishments around the photo. The yellow chipboard sticker, ticket, and puffy letters create a triangle, as do the blue-green shades of the hearts, "explore" sticker, and photo frame. To finish everything, I added my writing along that same diagonal, between the photo and the bottom right embellishment corner, then splashed with a bit of pink ink to tie in the painted style of the background paper and larger heart embellishments.
What's your favourite way to embellish with hearts? I hope February brings you something or someone you LOVE to scrapbook, be it a serious subject or some silly fun!


Such a happy page!😍😍😍
ReplyDeleteGreat story behind the page. My husband would be the same way. 🤣
ReplyDeletebeautiful! love the colors. My favorite way to embellish with hearts is to make it rain hearts!
ReplyDeleteSo great! Thanks for the detailed instructions. I’d love to do this with stars too!
ReplyDeleteI LOVE this page! It's so bright and cheerful to the eye. The colors just draw you right in!
ReplyDeleteLove it.. super great inspiration
ReplyDelete