Spring Frame Layout by Neftali Zambrano


Monday, May 31, 2021

Hi friends! Neftali Zambrano back on the blog today with a 12x12 monochromatic layout I created using another one of the cut files from Paige's 20 Days of Spring Cut Files and the Wonders collection.

For this layout I am using the Day 18: Spring Frame cut file. I started off by cutting out the cut file on a 12x12 sheet of blue cardstock, sized down to 11x11. I wanted to try something different by cutting the cut file on a colored cardstock because I knew that I wasn’t going to be backing it with much detail. Instead, I thought about backing it on a whole patterned paper, and I did so using Paper 11. This paper had the perfect mix of colors with a soft wash of “mixed media” look. I used my glue pen to add the cut file onto Paper 11 and then I added some ink splatters in blue and white. I also decided to add a bit of extra shine to the cut file by brushing a light coat of Shimmerz ink in a few random spots around the page, nothing too complicated.

I had lots of fun adding all the blue embellishments I could find from the Wonders collection. I used a whole array of pieces from the collection including the 8-Page Sticker BookFloral Die CutsPuffy StickersCardstock Stickers, ThickersBanner StickersLollies, and Chipboard Stickers. All of these wonderful bits from the collection gave me the perfect selection of blue embellishments to add all the pieces to my layout.

I hope this layout has inspired you to try something new: a monochromatic layout, a colorful cut file, and a mix of matching embellishments! Thanks for stopping by today crafty friends. See you next time!


SUPPLIES: Patterned paper, stickers, die cuts, embellishments: WONDERS; Die cut machine: Silhouette Cameo; Cut file: Spring Frame by Paige Evans

Location: California, USA / Blog: alltheneffyness / Instagram: @alltheneffyness / YouTube: Neffy Crafts + Scraps / Facebook: alltheneffyness / Pinterest: alltheneffynessscrap

Love the Zoo Layout by Paige Evans


Sunday, May 30, 2021

Hi again! Here is the other layout I taught how to make at my virtual class with Scrappin' in the City featuring a paper folding technique and my Wonders collection!

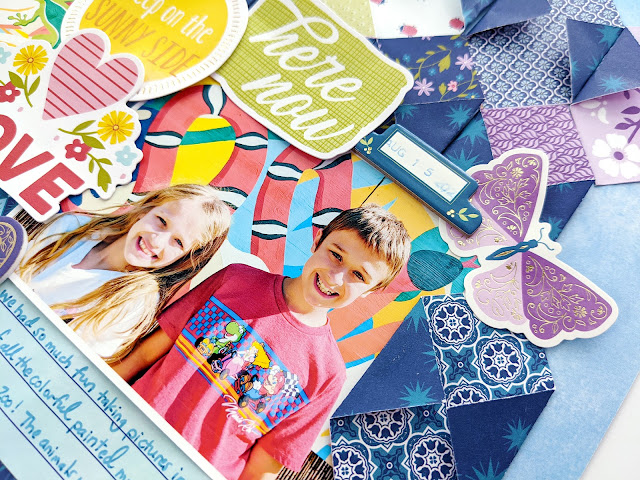
I started by cutting apart all of the patterned squares from Paper 20. Then I spent some time folding opposite corners of all the squares together to the middle for a fun paper folding design. For the background, I used the sky blue B-side of Paper 11 and adhered the folded squares in a rainbow order. Might be easiest to watch the process in the virtual class :)
I placed two photos across the center and then embellished around tone-on-tone using Ephemera Die CutsChipboard Stickers, and 6x12 Cardstock Stickers. The title in between "Love the Zoo" was made with an Ephemera Die Cut, an Epoxy Phrase Sticker, and Thickers. I wrote journaling with a blue pen on a journaling card from the Ephemera Die Cuts and tucked it under the blue section of the photo. To finish I stamped the date with the same blue pen acting as ink onto a blue tab Chipboard Sticker above the right photo.
I hope you are inspired to pick up my Wonders collection and try out this fun paper folding technique!
SUPPLIES: Patterned papers, stickers, die cuts, Thickers, embellishments: WONDERS

Wonders Coptic Book by Amber Mitchell


Saturday, May 29, 2021

Hello crafty friends, Amber Mitchell here on Paige's blog today to share with you a miniature coptic book I created using the Wonders collection and a handful of Paige's cut files. Find Paige's class on coptic bookbinding HERE.

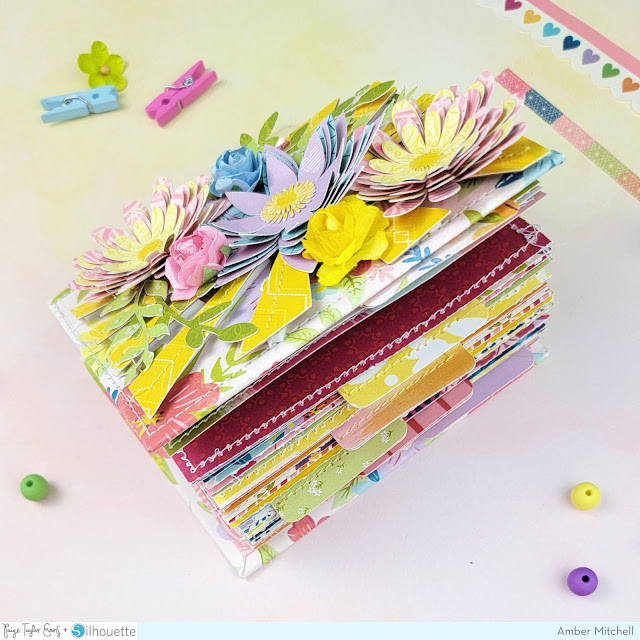
To create the covers of this book, I used two pieces of medium weight chipboard that measured 3.25x4.25 inches. I wrapped these pieces using Paper 16 and lined the backs of them using Paper 5. For added texture, I stitched along the outer edges of each cover.

To create the signatures for this book, I used the cut apart Paper 24. I cut the 3x4 inch rectangles into six pieces that measured 4x6 inches, then folded them in half down the middle. This created six signatures for the book.

For the pages of the signatures, I used 4x6 inch sheets of paper from Wonders that I folded in half. Each signature is made up of a total of four sheets, which allows for eight pages per each one. To easily separate the signatures throughout the book, I added a tab to the first page of each signature. And again, for added texture, I machine stitched along all the edges of all of my pages.

After binding the book using yellow embroidery thread and a handful of charms from my stash, I embellished the front cover using three of Paige's cut files. To add dimension and background context to the cover, I used the Sunburst Rays Background cut file. I sized it down in my Cricut software to about 3x4 inches and machine stitched with yellow thread along each ray.

To embellish further, I used two of Paige's Layered Flower and Leaves cut files. I created these from leftover scraps from this project and adhered them to the cover of my book. I curled the petals of each flower up using my fingers for added character. For a finishing touch, I added some Paper Flowers to the cover.

And with that, this coptic book is happy, bright, and ready for documenting! Thanks so much for visiting my post today, I'll see you next time with another fun project!


SUPPLIES: Patterned papers, stickers, die cuts, embellishments: WONDERS; Die cut machine: Cricut; Cut files: Sunburst Rays Background and Layered Flower and Leaves by Paige Evans; Coptic bookbinding class

Location: California, USA / Blog: Happy Crafty Studio / Instagram: @bambidearr / YouTube: bambidearr / Pinterest: bambidearr

This Life Layout by Shimelle


Friday, May 28, 2021

Hello crafty friends! Shimelle here today to share a little twist with Paige's Hearts Background cut file and the Wonders 2x2 Paper Pads! The trick to this page is all about setting up your cut file to run right off the edge of your paper.

I opened the Hearts Background cut file in Silhouette Studio then dragged it up the screen so half my page would remain uncut and the hearts would run right off the top edge. When I sent it to cut, I did get a warning message to make sure I knew some of my lines went off the screen and they would not be cut, but I clicked 'okay' and it did just what I had hoped: cut only what was on my paper.  I didn't have any trouble with it overcutting into the mat.

With that cut out, I backed each heart with a paper from the 2x2 Paper Pads. Then I pieced the background together with the uncut white cardstock and the light blue Paper 11. I added foam adhesive to the block of hearts and stuck them right back into place, now with dimension and a blue background filling the gaps!

I added three word Cardstock Stickers on top of the heart grid. On the bottom half of my page, I matted two 3x4 portrait photos with the same light blue paper and added the 'you make today better' card from the Ephemera Die Cuts. The title is a mix of the Epoxy Phrase Stickers, a Cardstock Sticker, and a series of Puffy Sticker semi-circles. My journaling fit in the space just above and below, written in grey ink. To finish the page, I added gold Puffy Sticker hearts and a bit of gold mist!

Which Paige Evans cut file might you try to cut off the page? It works with backgrounds for sure, but I also think a floral or even a wreath could be eye-catching. Be sure to share if you give this idea a try! Thanks for taking a look and happy scrapping!


SUPPLIES: Patterned papers, stickers, die cuts, embellishments: WONDERSwhite cardstock; Die cutting machine: Silhouette Cameo; Cut file: Hearts Background by Paige Evans

Location: London / Blog: Shimelle / Instagram: @shimelle / Facebook: Shimelle / YouTube: Shimelle Laine / Pinterest: glittershim

Hello Lovely You Layout by Missy Whidden


Thursday, May 27, 2021

Hey friends! Missy Whidden here with a new layout featuring Paige’s Wonders collection. This layout and color scheme was inspired by the cute little rainbow from the Chipboard Stickers. It was the first item I pulled to use and I based the rest of the page around it. I used the Peony Pop-Up Die to cut five large flowers using various patterned papers from Wonders using my manual die cutting machine. I chose papers that matched the colors in the rainbow sticker. I wanted lots of background texture, so I used Paige’s Polka Dots Stencil with modeling paste over a sheet of thick, smooth white cardstock. I did coat it with clear gesso first. Once the background was dry and I had the flowers arranged, I used a mix of Distress Oxides and Shimmerz sprays to create lots of color over the paste. I wanted to create a tone-on-tone effect with the colors.

Once the color was dry, I began arranging the embellishments around the photo and flowers. I used the Chipboard Sticker rainbow, one from the Lollies that I took apart, and one that I fussy cut from Paper 24. I layered them and popped them up with adhesive foam. I used a few of the Paper Flowers in matching areas and a few hearts from the Cardstock Stickers. For the title I used the Hello Lovely stamp from the Acrylic Stamps and mixed it with one of the Epoxy Phrase Stickers. I even used a few of the tiny flower stickers from the 8-Page Sticker Book. I used the crepe paper from one of the Lollies and layered it at the bottom of the photo.

This blue is my favorite! I just love the awesome texture from the Polka Dots Stencil and that beautiful deep blue color. This blue flower was cut from Paper 6. I used a few blue pieces here including a bird from the 8-Page Sticker Book that I attached to white cardstock and cut out. I also used a bit of the Washi Tape here as well as matching thread. I added gold splatters after everything was finished to give it a bit of shine.

More tone-on-tone going on over on the right side with yellow. I cut this flower from Paper 13. I embellished with more flowers and stickers and I just love how it all turned out!

How often are you inspired by one little item from a collection? I wanted to make that little rainbow piece work, so I began with and built the rest of the page around it. It’s so interesting to see where your project can go when you create around a specific item. This was so much fun to make and I hope it inspires you in some way. Thanks so much for stopping by!


SUPPLIES:
 Patterned papers, stickers, washi tape, stamps, embellishments: WONDERSgold paintwhite cardstockgessoDistress OxidesPolka Dots Stencilmodeling paste; Flower die: Peony Pop-Up
Blog: littlenuggetcreations.blogspot.com // Instagram: @missywhidden // Pinterest: @missywhidden
Facebook: missy.whidden // YouTube: Missy Whidden

The Sweet Life Layout by Adam Westwood


Wednesday, May 26, 2021

Hi! ScrappyAdam here and I'm very excited to be back on Paige’s blog with another Wonders layout for you. I have used one of Paige’s exclusive cut files available in the 20 Days of Spring bundle - the Flower Wreath.

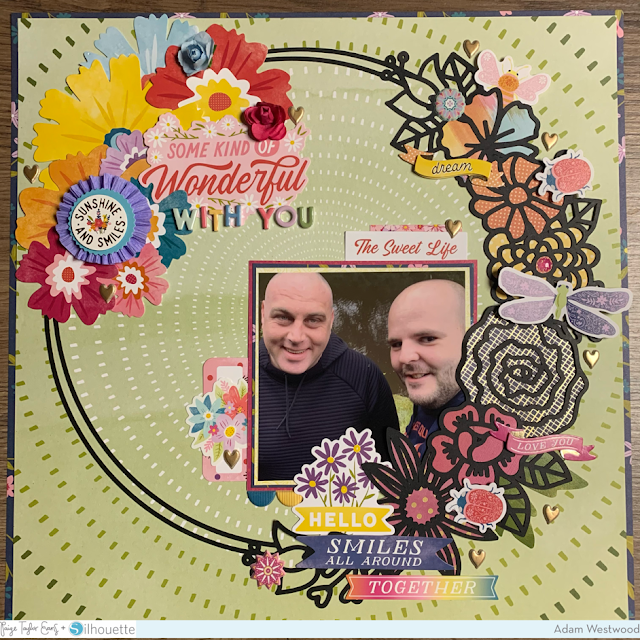
I started with the green sunburst style Paper 24 as my background and backed it with the gorgeous navy floral paper, giving ¼” border around the page, something I generally always do to finish the layout off. I then cut the Flower Wreath in black as I wanted it to really pop. The page came together quite quickly because the cut file really does take centre stage! I dived into lots of Wonders goodies including the Floral Die CutsEphemera Die CutsBanner StickersCardstock StickersPaper Flowers, and Puffy Stickers. It’s hard to choose a favourite product in this awesome collection but I do love the Lollies and I popped one on this page.

I created a floral cluster on the opposite side of the cut file florals which I had backed with papers from the 6x8 Paper Pad and the 2x2 Paper Pads - both perfect for backing cut files and small details so you don’t have to cut into the big 12x12” sheets! I have used a 4x4” photo to document a lockdown walk along the canal over here in England. It was then a case of layering lots of the lovely embellishments. This collection has so many embellishments to give your layouts and projects dimension and texture.

I hope you have enjoyed this page, thank you for taking the time to be here! You can find me on Instagram and I’ll be back soon with another wonderful Wonders project! In the meantime, do check out all the other awesome creatives right here on the blog - and don’t forget to join Paige’s Facebook group where there’s so much inspiration!


SUPPLIES: Patterned papers, stickers, die cuts, embellishments: WONDERS; Die cutting machine: Silhouette Cameo; Cut file: Flower Wreath by Paige Evans
Location: Manchester, England / Instagram: @scrappyadam / Facebook: Adam Westwood / Pinterest: Scrappy Adam

Mermaids & Mandalas Wreath Layout by Heidi K. Lewis


Tuesday, May 25, 2021

Hey there scrappy friends, Heidi K. Lewis here on the blog today to share a mermaids & mandalas wreath made with Paige’s latest Wonders collection and Mermaid cut file. When I really love a cut file, I will typically use it for multiple projects. I might as well get the most bang for my buck, am I right?! For my previous design team assignment, I painted the Mermaid cut file with watercolors, but I was curious to see how the same cut file would look backed with rainbow papers.

To make this layout, I uploaded the Mermaid cut file into Cricut Design Space, resized the image to 5.5 inches and made 4 copies of the image. Then I arranged the mermaids into a circle and used the “weld” function in Design Space to connect all of the mermaids into a single wreath. Then I cut out the wreath with textured white cardstock, which is my favorite cardstock for intricate cut files. Then I used the 6x8 Paper Pad to back the mermaids with patterned papers that were arranged in rainbow order. To help the white cut file standout from the white background, I layered fussy cut mandalas behind the mermaids using the tone- on-tone technique. Most of the mandalas are from the 6x8 Paper Pad and I also cut out a few from Paper 1. Combined with the mermaids, the mandalas remind me of sea urchins.

To finalize the layout, I selected a couple of photos of my niece posing on top of a seal statue at the zoo. I only used a single embellishment from the Banner Stickers on my page because the layout was already pretty busy. The title made from the Thickers s serves as a focal point for the page and ties all of the rainbow colors together.

I hope this layout inspires you to make the most out of your cut files! Have a happy scrappy day!


SUPPLIES: Patterned papers, stickers, embellishments: WONDERSwhite cardstock; Die cut machine: Cricut; Cut file: Mermaid by Paige Evans

Location: Idaho, USA / Instagram: @heidi.k.lewis / Facebook: Heidi K. Lewis / Pinterest: klipheid09

Crete Mini Album by Jennifer Rambert


Monday, May 24, 2021

Hi paper lovers! Jennifer Rambert back with a mini album that traces a day of our trip to Crete in 2019. I used a lot of phrase cut files from Paige Evans as well as her Go the Scenic Route collection.

This album measures 5.5"x6". The cover is made with cardstock covered with white imitation leather. For the inside pages, I used watercolor paper. All the photos are 4x6". For the background of the pages and the cover, I used the same technique on the cover and the pages. I applied blue and green Shimmerz inks on a few areas, then I stamped the mandala motif from the Acrylic Stamps in tone-on-tone and I added texture with the Polka Dots Stencil by Paige Evans with modeling paste.

For the decoration of the pages, I made the same decoration on each page: a cut file, a stamp from Paper 3Chipboard StickersPuffy Stickers, flowers and butterflies, and Paper 17 labels sewn on the photos. I used sentence files cut from Paper 8Love This Lake Life, One Day at a Time, Best Friends Forever, All About Me, and Miss You So Much. I cut them to keep only the words I wanted. I also created pockets to insert tags. For the decoration of the two covers, I used polaroid Puffy StickersThickers, flowers, and tag frames.

I finished by adding a ribbon to close my mini album and I splashed black ink of course!

I hope this album gives you some ideas and I hope you enjoyed it! Thank you so much for stopping by and I wish you a beautiful day full of creativity!


SUPPLIES: Patterned papers, stickers, Thickers, stamps, die cuts, embellishments: GO THE SCENIC ROUTEwhite cardstockwhite acrylic paintDistress OxidesPolka Dots Stencilmodeling paste; Die cut machine: Silhouette Cameo; Cut files: Love This Lake LifeOne Day at a TimeBest Friends ForeverAll About Me, and Miss You So Much by Paige Evans

Location: France / Instagram: @secretsandcreations / Blog: Secrets & Creations / Facebook: Secrets & Creations / Pinterest: secretsandcreations

Hello There Dreamer Layout by Paige Evans


Sunday, May 23, 2021

Hey there! Here is a layout that I taught how to make in a virtual class with Scrappin' in the City recently using Wonders!

This layout features the rainbow striped Paper 2. I trimmed each of the stripes into their separate colors and then took some time to distress the edges. I kept the barcode strip to be able to place them back in the same order.
The background is a piece of textured white cardstock and I adhered the colored paper stripes on it, only placing adhesive on the back center of the stripes so the edges could lift and bend and create dimension.
I added a 4" square photo to the top and then embellished tone-on-tone cascading down the middle of the layout using bits and pieces from the Chipboard Stickers6x12 Cardstock Stickers8-Page Sticker BookEphemera Die Cuts, and Puffy Stickers. To finish, I journaled with an orange pen on a journaling card from the Ephemera Die Cuts and tucked it into the photo/title cluster.
I hope you are inspired to create a similar layout using my Wonders collection!
SUPPLIES: Patterned paper, stickers, die cuts, embellishments: WONDERSwhite cardstock

This is Us Layout by Valerie Bisson


Saturday, May 22, 2021

Hi there, Valerie Bisson back today for Paige’s Cut File Design Team with a new scrapbook layout featuring the Wonders collection and Flower Heart cut file.

I started by cutting the Flower Heart cut file at 11.5 inches wide from white cardstock. Next I backed the cut file with several different Wonders patterned papers and some from the 12x12 Paper Pad. Then added my large photo. For some extra interest to the cut file, I added a little hand stitching, making French knots on a few of the flowers in matching colours.

After looking through the papers in the collection I decided on Paper 11 for the background and added the cut file with dimensional foam adhesive. When the main elements of the page were complete I added my title with the wonderful Thickers and a gold ampersand from my stash. Next I embellished with Chipboard Stickers: 3 of the hearts and a file tab on which I added the date. I also used a pink label from the Ephemera Die Cuts to add my journaling. Next I added a couple of the Epoxy Phrase Stickers, "selfie" added at the top left and "this is us" onto the label on the lower right side. For final touches, I used the Acrylic Stamps and stamped the various little flowers from the set with Distress Oxides in Chipped Sapphire. On the stamped flowers I added nuvo crystal drops in white, a little dot in the centre of each flower. One final detail was adding 3 of the gold hearts from the Puffy Stickers.

Next time you’re not sure how to design a scrapbook page, try a large photo surrounded by a beautiful cut file that fills the page. Thanks so much for stopping by and happy crafting!


SUPPLIES: Patterned papers, stickers, Thickers, die cuts, stamps, embellishments: WONDERSwhite cardstockDistress Oxides; Die cut machine: Cricut Explore Air 2; Cut file: Flower Heart by Paige Evans

Location: Manitoba, Canada / Instagram: @valeriearts2 / Pinterest: valeriearts2 / Facebook: Valerie Bisson

Paige Taylor Evans © // Quinn Creatives DESIGN