Hello crafty friends, Amber Mitchell here on Paige's blog today to share with you this fun 4" square chipboard mini album I created using the Go the Scenic Route collection and a handful of Paige's cut files.
To create the base of this album, I used three pieces of chipboard. The two pieces for the covers measure 4 x 4-inch, while the spine measures 4 x 1.5-inch. I wrapped my chipboard using the beautiful swatch, ombre Paper 21. To line my album, I used the vibrant blue Paper 13. With the base of my album wrapped and lined, I moved on to the pages. The pages for this album measure 3.75 x 3.75 inch and are adhered together on just three sides in order to create a pocket. To add my pages to the base of the album I opted for a hinge binding. I used layered strips of paper at the following measurements to create the hinges: 2.5 x 3.75-inch, 2 x 3.75-inch, 1.5 x 3.75-inch. Lengthwise, I scored half an inch on both sides of all 3 of my paper strips. Then I creased these folds, creating the hinges. Next, I stacked them from largest to smallest gusset and adhered them to the inside spine of my album base.
When adding the pages to the hinges, I adhered only 3 sides of them together. This created pockets that I was then able to add journaling spots and photo mats to. These photo mats measured 2.5 x 3 inches. To embellish this album, I used a mix of bits and pieces. For the cover, I created a heart filled with paper flowers that I made using Paige's Rolled Flower cut files. I love this statement piece and how it catches the eye. On the outer spine of the album, I added paper tassels, Charms, and colorful hearts from the Chipboard Stickers.
For the pages, I decided to embellish every other one in the album. For the title page, I fussy cut flowers from Paper 18 and layered them over their matching counterparts to create a 3D effect. I used the Puffy Phrase Stickers to add a "Happiness is Here" sentiment and another Chipboard Sticker heart for a finishing touch.
The next page is my favorite. I used the Sunburst Rays Square cut file to create a cluster. I layered these up with some Floral Die Cuts, a rolled flower, and Chipboard Stickers. I love how vibrant this page is!
The Be You Do You For You cut file was a fun sentiment to add to this album. And, it was a pleasant surprise to find out that, when sized down to fit in this album, the letters matched up perfectly with the Foam Thickers. I layered those right on top of the cut file and added a butterfly Ephemera Die Cut for extra flair.
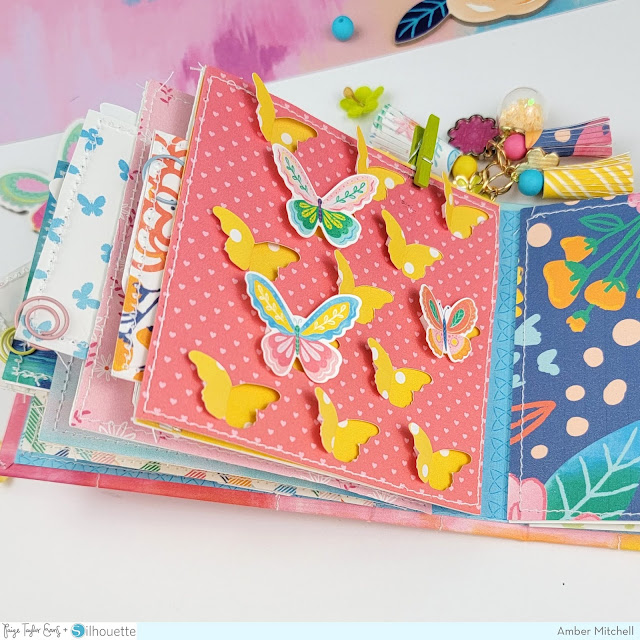
The last cut file I used in this project is one I've been meaning to try for a while. I love the card cut files Paige has, and this Cut and Fold Butterflies Card cut file is so perfect for this mini! I cut it from Paper 1 and turned it into an interactive, fold out page. I propped the butterflies wings up with foam tape to keep them open and added extra butterfly Ephemera Die Cuts to drive home the theme.
And with that, this mini is ready for all types of fun summer memories! You can watch the process video HERE. Thanks so much for stopping by my post today! I'll see you next time with another fun project!
SUPPLIES: Patterned papers, stickers, Thickers, die cuts, charms, embellishments: GO THE SCENIC ROUTE; Die cut machine: Cricut; Cut files: Rolled Flowers, Sunburst Rays Square, Be You Do You For You, and Cut and Fold Butterflies Card by Paige Evans
Location: California, USA / Blog: Happy Crafty Studio / Instagram: @bambidearr / YouTube: bambidearr / Pinterest: bambidearr


I should just call my PIN board for Minis 'Amber-Dear' 😁 I adore everything you create. I love all the things sticking off the edge of the page, I must do this too! 💛💛 xK
ReplyDelete