Paper Folders by Stefanie Ried


Thursday, March 31, 2022

Stefanie Ried here and today I have a new project for you. A lot of mini paper folders have jumped off my table. The project was so much fun. Last year I made similar folders in a bigger size. And I really wanted to create these folders in mini format with my favourite papers from Paige's collections like BUNGALOW LANEWONDERSGO THE SCENIC ROUTEBLOOM STREET, and TRULY GRATEFUL. Whereby the choice of the papers was really the most difficult. There are sooo many incredibly beautiful colors and patterns that I could have made many more folders.

The folders have a size of 3 x 4 inches. So they are perfect for including small die cuts, stickers, etc. I have also used such a folder as packaging for a birthday gift certificate. And if you create a small stock of such folders, you always have a suitable packaging for a small gift. Unfortunately, I am not a card maker. That's why I find small folders a good solution :)

I'll show you a few pictures of how the folders were made. First you cut a paper of your choice in the size 7 x 6 inches. Fold and cut it as shown in the photo below.

In addition, you need another piece of paper in the size 3 x 4 inches for the inside left to reinforce the cover. Simply glue the paper in place as shown in the photo.

Now punch the holes for the eyelets with the Crop-A-Dile. For this, set the distance of the large hole to 0.5 inch. Then mark the holes as shown in the photo. Always 1.5 inches from the corners.

Now take a thin elastic yarn and insert it into the upper hole from the outside. It is enough to insert the string only a little bit. Now insert the eyelet into the hole from the outside. That way the string holds tight. Place the string as shown in the photo and attach the eyelet through the hole with the Crop-A-Dile.

On the photo above you can see how it looks on the backside. The eyelets are a bit small, so they don't look so nice. But you can see that the string is attached. You can also cut off the end. Now put the two eyelets on the edge and thread the elastic through. Close the folder for this. This way you can see how much elastic thread you need for your folder. Then thread the end of your elastic through the lower hole from the outside again and clamp the last eyelet. Your folder is ready!

I hope you enjoyed this little inspiration! Thank you for stopping by!

SUPPLIES: Patterned papers, stickers, die cuts, embellishments: BUNGALOW LANEWONDERSGO THE SCENIC ROUTEBLOOM STREET, and TRULY GRATEFULCrop-A-Dile
Blog: steffiried.blogspot.com / Instagram: @steffiried / Pinterest: @steffiried / Facebook: stefanie.ried.96 YouTube: Steffi Ried

Mini Envelope and Layered Triangles Layouts by Paige Evans


Last Saturday I taught a Virtual Layouts Class featuring mini envelopes and layered paper triangles and the class is available online HERE!

First, learn how to create mini patterned paper envelopes atop a mixed media background! A sewing machine is not required, I'll show you how to make them without the sewing, but goodness knows I do love adding machine stitching :) 
A cutting machine is also not required, we'll make the envelopes by hand. I use a mix of older collections from Maggie Holmes and Jen Hadfield, but you can use lots of goodies from your stash.
Then learn how to make a stunning frame of paper strip triangles! This a great way to use up all those barcode strips you've been hoarding, or paper scraps!
I love how a simple technique repeated can create such a dynamic and interesting page!
I hope you are inspired to check out my Mini Envelopes and Layered Triangles Layouts Virtual Class!

Bloom Street Mini Album by Amber Mitchell


Wednesday, March 30, 2022

 Hello crafty friends! Amber Mitchell here on Paige's blog today to share with you an easel-style mini album I created using the always stunning Bloom Street collection.

To create the base of this mini album, I used two pieces of medium weight chipboard that measured 3.5 x 4.5 inches. I wrapped and lined these pieces using scrap papers from the 12x12 Paper Pad.

The pages of this mini album are made from cut-aparts from both the 12x12 Paper Pad and Paper 17. I backed each cut-apart, most of which were 3 x 4-inch journaling cards, with patterned paper from the 6x8 Paper Pad. I also added a few pages that I created using scraps from the Specialty Transparency Paper; this acetate sheet is so pretty that I couldn't not include it in this project! A few extra pages made from 2 x 2-inch cards and tags added more character to the album.

To bind this album, I used the Mini Cinch by We R Memory Keepers. To create the easel-style of this mini, the two "covers" of this album need to be back-to-back when bound; this allows the album to stand up on its own.

When it came to embellishing I used a mix of pieces from the physical collection of Bloom Street as well as the Bloom Street Digital Collection. One of my favorite things about using the digital collection is that I can print and cut as many flowers as I want. And, if there's one thing I love in paper crafting, it's flowers! I can never get enough!

I layered a bunch of florals throughout the album, even framing them along the 2.5 x 3.5-inch photo mats I added to the back of each 3 x 4-inch journaling card.

Along with the florals, I also used embellishments from the Layered Butterfly Stickers, 4-Page Sticker Book, Cardstock Stickers, and Puffy Vinyl Stickers. 

As always, the final touch was a dangle made of tassels and charms. I used a few tassels from my stash, along with a handmade pom-pom charm and one of the Flower Charms from Bloom Street.

I love this album and I loved making it. It's been a while since I've used the Bloom Street collection and after working with it again on this album, I've remembered why it was one of my favorites!

Thanks so much for visiting my post today. I'll see you next time with another fun project!


SUPPLIES: Patterned paper, stickers, embellishments, die cuts flower charm; BLOOM STREETMini Cinch Tool from We R Memory Keepers

Location: California, USA / Blog: Happy Crafty Studio / Instagram: @bambidearr / YouTube: bambidearr / Pinterest: bambidearr

Clovers Layout by Yui Oku


Tuesday, March 29, 2022

Hi everyone, Yui Oku here today with a new layout featuring Paige's Cut Files and Wonders collection! I love cut files where can put three photos because I have three kids and I want to put a picture of each one. It's difficult to take a picture of all three together lol. You can combine each photo taken at the same time into one layout!

I chose the Clovers Cut File and I put their photos inside a section of the leaves. Then I changed the color of the clover one by one. Wonders has a lot of colors! I found good green patterned paper (Paper 8) for the background. It looks like a clover pattern right?! I put it on the white cardstock background with a slight shift. Then I folded the corner so that the backside butterflies can be seen. Lastly, I added some embellishments such as Chipboard StickersCardstock Stickers, and Thickers for the title.

SUPPLIES: Patterned papers, stickers, embellishments: WONDERSwhite cardstock; Cut file: Clovers by Paige Evans


Blog // Instagram // YouTube // Facebook

Eighteen Layout by Valerie Bisson


Monday, March 28, 2022

  Hi everyone! Valerie Bisson here today with a pretty purple page featuring Paige's cut filesBloom Street, and the Bloom Street Digital Collection.

I started with two cut files: the Flower Bunch which I cut twice to add interest to the background and the Eighteen for my title which I cut several times in offsets to sandwich in some sequins. Word sentiments, flowers, and hand stitching surround my photos for a central showcase. To finish I added a few enamel dots and a light sprinkling of white acrylic paint. Have a wonderful crafty day!

SUPPLIES: Patterned papers, stickers, die cuts, embellishments: BLOOM STREETsequinswhite acrylic paintenamel dots; Cut files: Flower Bunch and Eighteen by Paige Evans


Instagram // Facebook // Pinterest

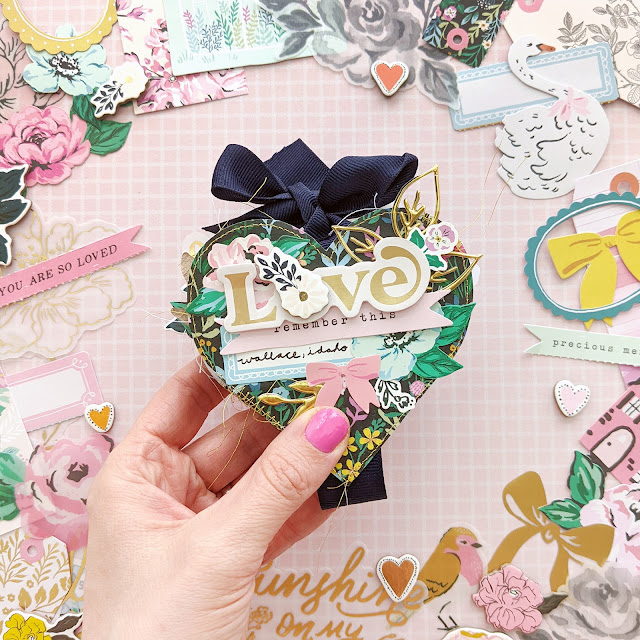
Wallace, Idaho Squash Heart Mini Album by Paige Evans


Sunday, March 27, 2022

  Yesterday I taught a Squash Heart Mini Album Virtual Class and it's available online HERE!

A cutting machine is not required, we create all the pages by hand! A sewing machine is also not required, I just love to add that texture :)

I used a mix of older collections to create this project, namely supplies from Maggie Holmes and Jen Hadfield.

This Squash Heart Mini Album features flip-ups and lots of interactive elements, all tied together with a pretty ribbon bow!

A PDF with a list of supplies, photo sizes, instructions, templates, and the link to the YouTube video will be emailed within 24 hours of purchasing.

Here are pictures of all the pages in this Squash Heart Mini Album. Let me know if you have any questions about anything!

I hope you are inspired to check out my Squash Heart Mini Album Virtual Class!
Paige Taylor Evans © // Quinn Creatives DESIGN