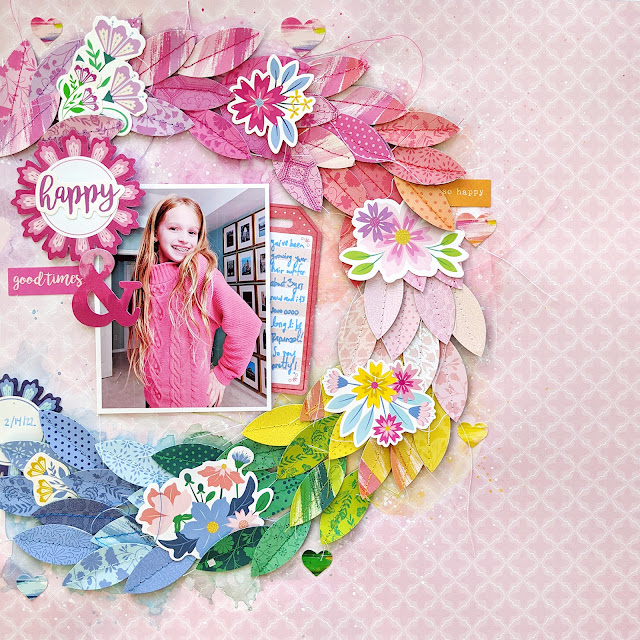
Here is a layout I made with leftover kits supplies from my "snack & scrap" mini class at the Crop & Create Delivered Papercrafting Event in April!
HAPPY & GOOD TIMES by Paige Evans
SUPPLIES: Horizon: Paper 01, 02, 03, 08, and 12, Cardstock Stickers, Ephemera Die Cuts, Floral Die Cuts; paper trimmer; fine-tipped scissors; blue journaling pen; adhesives (liquid, foam); white gesso, Pastel Dreams watercolors, white acrylic paint, paint brush, cup of water, sewing machine and a rainbow of thread colors, 2 ½” circle punchINSTRUCTIONS:
1. Use a 2 ½” circle punch to punch out the circles of the quilt patterned Paper 12 then use just the edge of the circle punch to punch out all the petal shapes. Alternatively you could fussy cut all the petals.
2. Machine stitch through all the petals using a matching colored thread. Slightly bend each petal for dimension.
3. On the pink patterned B-side Paper 02, apply a ring of white gesso off-center, overlapping the left edge. Once dry, paint and splash watercolors in a rainbow over the gesso. Once dry, splash white acrylic paint on top as the last layer.
4. Once the background is completely dry, adhere the petals in a wreath using foam squares for dimension.
5. Place a 3x4” photo inside the wreath, tuck a tag journaling spot die cut under the right edge, and journal on it with a blue pen.
6. Embellish the wreath with flower stickers and die cuts and place small heart stickers outside the wreath in the same color way.
7. Cluster same colored stickers and die cuts on the top left corner of the photo to create a title to finish.
 Check out all of my virtual layout classes HERE!


I was trying to figure out how you got a leaf shape from a circle, how clever. It's gorgeous! 💗
ReplyDeleteFabulous page! I can't wait to make some leaves! Thank you!
ReplyDelete