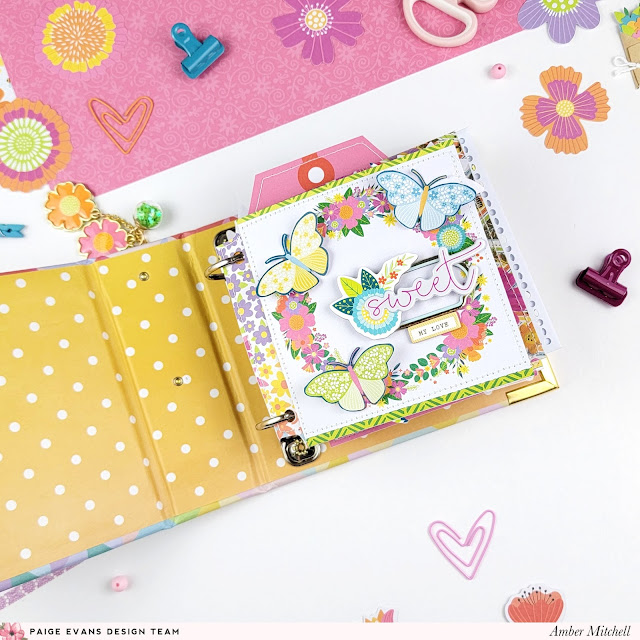
Hello crafty friends! Amber Mitchell here on Paige's blog today to share with you a super fun mini album that I created following Paige's newest 4x4 Mini Album Virtual Class and her Splendid collection!
I've never really made an album using a binder before. Years ago, I made a December Daily album using a 6 x 8 inch one, but I struggled with it and ever since, I've steered clear thinking that they weren't the type of project for me. After taking Paige's class however, I believe I have a newfound love for this style of mini album and I'm looking forward to making more in the future!
To create the pages for this mini album, I followed the tips shared in Paige's virtual class. It was so fun putting these styled pages together and having a guide to follow took a lot of the stress of designing multiple pages out of the equation. I'm so thrilled with how each and every page turned out!
One thing that I altered about this mini album was that I opted to use less pocket pages in mine. One of my favorite things about creating minis is putting pages together from paper, so, although I did add a few blank pocket pages to the back of my album to use for photos at a later date, most of my pages are just paper.
By removing the pocket pages, I also removed a lot of photo space from my mini. To make up for this, I added pockets, envelopes, and flip ups to multiple pages throughout my album. These additions allow extra space for photos and mementos to be stored. The envelopes I used are from the Lace Envelopes & Cards from the Splendid collection.
Along with the beautifully designed pages from Paige, I added a couple designs of my own to this mini. One of which is a fun tag page I created using Paper 22. The other two pages are half circle pages I created by cutting 4.25 inch circles in half and adhering them together back-to-back. To these pages I added small photo mats.
I also used a few of Paige's cut files throughout this album. The first is the Stars Background Cut File. I love how whimsical this cut file is. I added it to a pocket page to protect the design and clipped it into the album so that it would lay across a floral paper.
The next cut files I used are some of Paige's flower cut files. You can find these on her Etsy shop. I love using the Layered Flower and Leaves to create dimension on all of my projects and the Rolled Flowers are simply too fun not to use.
To embellish this album, I used all of the fun pieces from the Splendid collection. On the cover I used one of the flowers from the Cross Stitch Kit and I love how it pops when layered up with pieces from the Floral Die Cuts! Throughout the album I added several of the Heart Paper Clips to later help hold photos or journaling cards into place. I also used the 2x2 Paper Pads to create some small photo mats and of course used a mix of all of the stickers to fill in any empty spaces. I also added, as finishing touches, some of the Flower Charms to the outer spine and some butterflies that I fussy cut from the 12x12 Paper Pad and the 6x8 Paper Pad to most of my pages.
I'm so happy with how this mini album turned out and I would highly recommend Paige's virtual class to beginners like myself! Like I said previously, I can't wait to make more of these!
Thanks so much for stopping by my post today! I'll see you next time with another fun project!
SUPPLIES: Patterned paper, die cuts, stickers, paper clips, charms, cross stitch kit, embellishments; SPLENDID by Paige Evans
Location: California, USA / Blog: Happy Crafty Studio / Instagram: @bambidearr / YouTube: bambidearr / Pinterest: bambidearr


Oh wow...that mini album is fabulous!
ReplyDelete