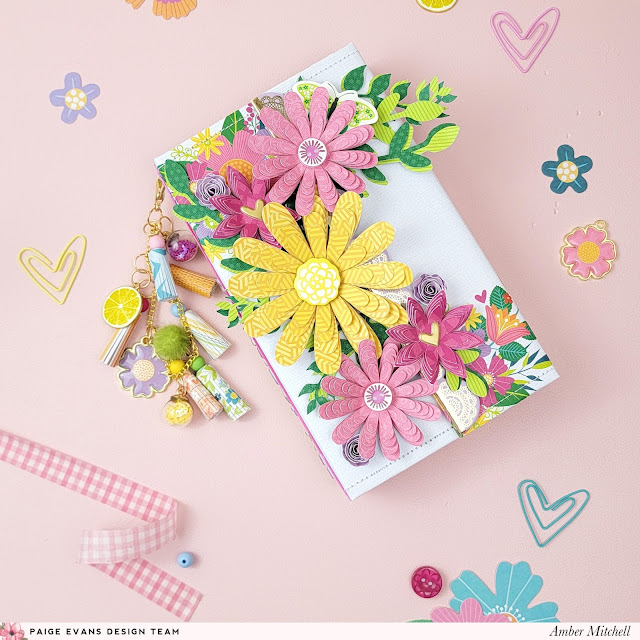
Hello crafty friends! Amber Mitchell here on Paige's blog today to share with you a fun, versatile project I created using the Splendid collection and a handful of Paige's Layered Flower Cut Files.
I love creating journals of all shapes and sizes. Just like mini albums, there are endless possibilities when it comes to putting these types of projects together. For this project, I created a chipboard book that features a magnetic closure, along with elastic binding that holds four journals. This type of project can be used for any occasion and I'm excited to share with you how to put it together!
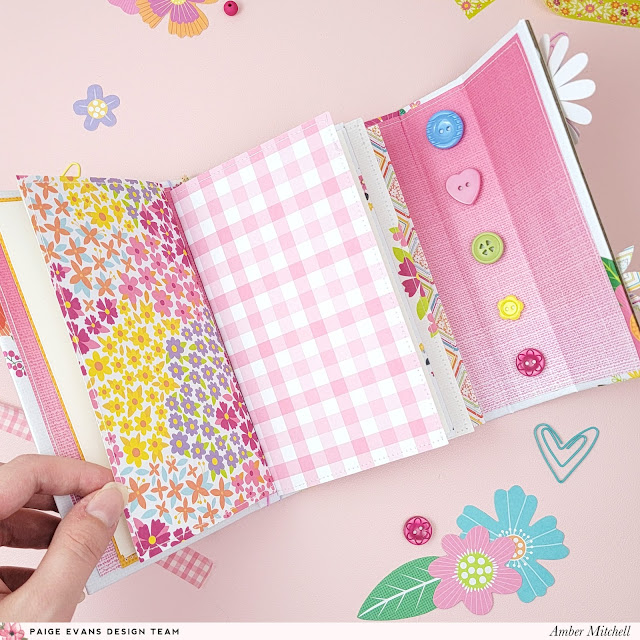
To create the base of this book, I used five pieces of medium weight chipboard with the following measurements: 1.5 x 7 inches (two pieces) (A), 2 x 7 inches (B), 4 x 7 inches (C), and 4.25 x 7 inches (D). I then wrapped these using a sheet of paper from the 12x12 Paper Pad in the following order: C, A, D, A, B. I had to actually use two sheets of this paper adhered end to end to wrap this project as it was longer than 12 x 12 inches. I also added a magnetic closure to this book during the wrapping process so that the magnets would be hidden. I did this by adding a magnet to the top side of piece C and the bottom side of piece B.
After lining the inside of the book, I moved on to creating the journals. These are super easy to make, especially since I just used white cardstock for the pages. For the journal covers, I used 4 sheets of paper that measured 6.75 x 7.5 inches and folded them in half. Next, I took three sheets of white cardstock for each journal (so twelve sheets in total) that measured 6.5 inches x 7.25 inches and folded those in half as well. I then stacked my pages and wrapped the cover pieces around them and added them to the book using elastic thread. Fun tip: I painted my elastic thread using colors that matched those found in Splendid!
With all of my journals bound, I started the embellishing process. I knew when creating this project that I wanted to go big or go home when it came to adding flowers. I used three different Layered Flowers and Leaves Cut Files from Paige to create these flowers. I also used a Rolled Flower Cut File to create three small flowers that finished off the look.
For a bit more flair on the cover, I added a scalloped edge sticker from the Chipboard Stickers on the right-hand side. To decorate the spine a bit more, I added the title of this project - Whimsical Life - using the mini foam Thickers. Lastly, I added a bunch of handmade paper tassels and charms, including one of the Flower Charms, to the spine using a lobster clasp, eyelet, and a Crop-A-Dile tool.
When it came to embellishing the inside of this project, I kept it simple. Along the right-hand spine I added a line of Buttons. I love the pop of colors these added. Since I'm not sure what I'll be using this project for yet, I've decided to leave the covers of the journals blank for now. This way I can personalize them later to match what I'm documenting.
I'm so happy with how this book turned out! I love the wild & free vibes the overgrown flowers bring to it and I love the colorful title and the happiness it adds. Thanks so much for stopping by my post today! I'll see you next time with another fun project!
SUPPLIES: Patterned paper, Thickers, die cuts, stickers, paper clips, charms, embellishments; SPLENDID by Paige Evans; Cut Files: Layered Flowers and Leaves and Rolled Flowers by Paige Evans
Location: California, USA / Blog: Happy Crafty Studio / Instagram: @bambidearr / YouTube: bambidearr / Pinterest: bambidearr


I love this “journal” with smaller journals inside. I have made several already for various friends…thank you for the wonderful inspiration. 🎉
ReplyDelete