I have a new layout & process video (YES! a process video!!) made with Garden Shoppe to share with you today!!!
Check out the process video to see how this page came together from start-to-finish:
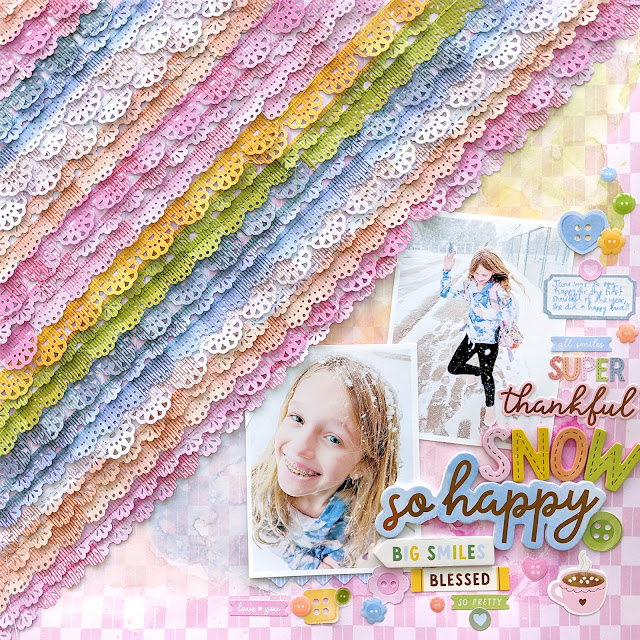
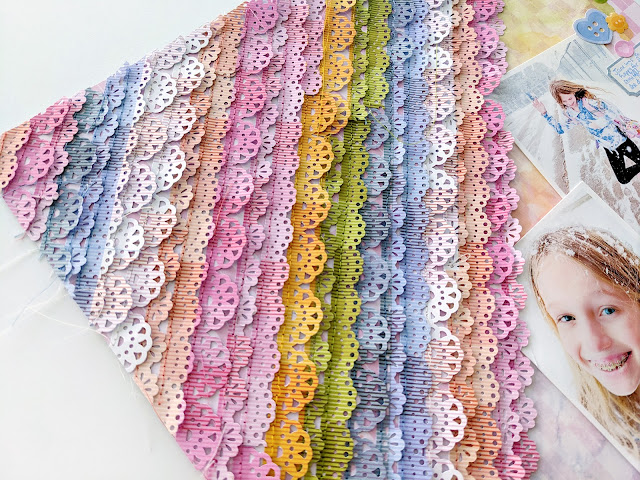
I began by punching Paper 19 with 3 different scalloped Border Punches into a whole bunch of paper strips and then layered them up diagonally over the left half of the pink checkerboard B-side of Paper 20. I didn't glue anything down yet though - I took a picture to refer back to and then removed them from the background.
I applied white gesso to the bottom right section, let it dry, and then dropped Pastel Dreams and Tropicals watercolors to match the colors of Garden Shoppe on top and let it dry.
Then I machine stitched the paper strips in place using matching colors of thread. After stitching, I lifted and bent each row of scallops up to create beautiful texture & interest. Time for photos and embellishments! I added two 3x4" photos onto the bottom right and then placed a bunch of embellishments on and around to balance the colorful punched papers.
Specifically I embellished with Thickers, Foam Phrase Stickers, buttons from the Ephemera Die Cuts, Cardstock Stickers, bits from the 8-Page Sticker Book, and Enamel Button Stickers. I wrote journaling with a periwinkle pen on a journaling spot sticker to finish.
I hope this layout inspires you to use my Garden Shoppe collection with Border Punches!
Let me know if you have any questions - happy to help!
Let me know if you have any questions - happy to help!
SUPPLIES: Patterned papers, stickers, die cuts, embellishments: GARDEN SHOPPE; gesso; Watercolors: Pastel Dreams and Tropicals by Prima; Border Punches; Sewing machine: Brother; Thread: Coats & Clark


Beautiful layout! You put so much detail, texture and Love into creating it.
ReplyDeleteSo pretty Paige. That Martha Stewart punch is my favorite border punch of all time. Question.....do you find that the adhesive on the strips gunks up your machine needle?
ReplyDeleteThank you! Yes, I have found that the needle gets sticky so I have a bottle of Un-Du close by to wipe it off :)
DeleteGreat Tip! I will do that. I love this layout and would really love to do this. Thank you for all your beautiful inspiration, but thank you most of all for replying to my comment and answering my question. XO
DeleteHow many rows of punched strips did you do? I love your designs. Your pages are so well designed!
ReplyDeleteI punched the entire paper and used almost all of them :)
DeleteI love your layouts and colors. I am getting ready to make this one, and am nervous about the width of the strips, and punching them. About how wide are the strips?
Delete