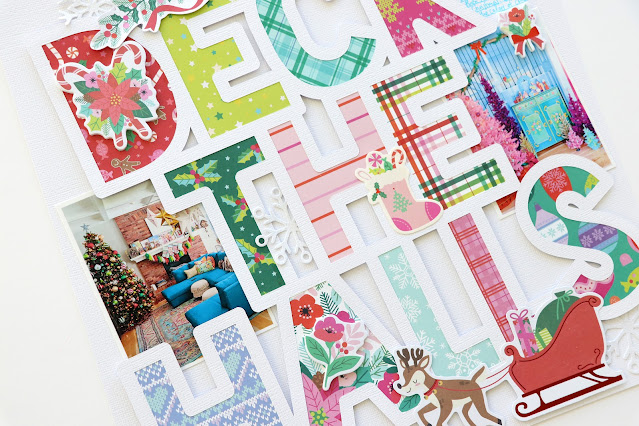
Today I'm teaching in-person classes at our Sugarplum Wishes Weekend Event! We'll kick off the day making layouts, then a mini album, followed with cards! Here is one of the pages:
1. Cut out the DECK THE HALLS from white cardstock, flip the cut file over and trace the inner letters onto the backsides of the following Sugarplum Wishes papers:
D - red candy canes Paper 7 / E - lime green stars Paper 10 / C - teal plaid Paper 3 / K - pink nordic Paper 3
T - green holly Paper 8 / H - pink striped Paper 11 / E - plaid Paper 2
H - purple nordic Paper 9 / A - floral Paper 1 / L - blue snowflake tag from Paper 1 / L - pink plaid from the 6x8 Paper Pad
S - teal ornaments Paper 10
T - green holly Paper 8 / H - pink striped Paper 11 / E - plaid Paper 2
H - purple nordic Paper 9 / A - floral Paper 1 / L - blue snowflake tag from Paper 1 / L - pink plaid from the 6x8 Paper Pad
S - teal ornaments Paper 10
2. Cut out the letters about 1/8” wider than the pencil lines then use liquid glue to adhere them onto the backsides of the letters of the cut file.
3. Attach the backed cut file at a slight angle using foam squares for dimension onto a piece of white cardstock then tuck a 3x4” photo under the left and right sides.
4. Add a garland Ephemera Die Cut at the top. Tuck (5) white glitter Snowflake Die Cuts around the page as shown.
5. Place a reindeer/sleigh Ephemera Die Cut at the bottom edge. Put a floral/candy cane Foam Sticker on the “D”, a floral Foam Sticker on the “A”, a floral Foam Sticker at the top of the right photo, and a stocking Cardstock Sticker between the “H” and “E”.
6. To finish use a blue journaling pen to draw lines and write journaling above the right photo.
I hope you're inspired to document decking your halls using my DECK THE HALLS cut file paired with Sugarplum Wishes!
SUPPLIES: Patterned papers, stickers, die cuts, embellishments: SUGARPLUM WISHES; white cardstock; Cut file: DECK THE HALLS by Paige Evans


Post a Comment